Replacing the timing belt with Lada Priora 16 valves
Content
The timing belt synchronizes the mutual rotation of the crankshaft and camshafts. Without ensuring this process, it is impossible for the engine to work in principle. Therefore, the procedure and timing of belt replacement should be approached responsibly.
Scheduled and unscheduled timing belt replacement
During operation, the timing belt stretches and loses its strength. When critical wear is reached, it can break or shift relative to the correct position of the camshaft gear teeth. Due to the peculiarities of the 16-valve Priora, this is fraught with the meeting of valves with cylinders and subsequent expensive repairs.

Replacing the timing belt prior 16 valves
According to the service manual, the belt is replaced with a mileage of 45000 km. However, during routine maintenance, it is necessary to inspect the timing belt to diagnose premature wear. Reasons for unscheduled replacement:
- cracks, peeling of rubber or the appearance of waves on the outer surface of the belt;
- damage to teeth, folds and cracks on the inner surface;
- damage to the end surface - loosening, delamination;
- traces of technical fluids on any surface of the belt;
- loosening or excessive tension of the belt (prolonged operation of an excessively tensioned belt leads to micro breaks in the structure).
The procedure for replacing the timing belt on a 16-valve engine
For the correct execution of work, the following tool is used:
- end faces for 10, 15, 17;
- spanners and open-end wrenches for 10, 17;
- flat screwdriver;
- special key for tensioning the timing roller;
- pliers for removing the retaining rings (instead of the special key).

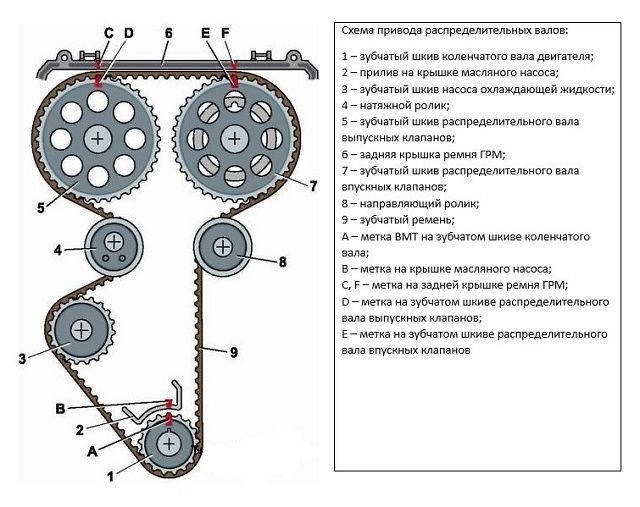
Timing belt diagram, rollers and marks
Removing the old belt
Remove the plastic protective shield. We open the inspection hole of the clutch housing and set the flywheel mark. All marks, including the camshaft gears, are set to the upper position. To do this, turn the crankshaft with a head of 17.
There is another way to crank the crankshaft. Jack up one of the drive wheels and engage first gear. We turn the wheel until the marks are correctly set.
Then the assistant fixes the flywheel, blocking its teeth with a flat screwdriver. We unscrew the generator pulley bolt, remove it together with the drive belt. With a 15 head, we give up the tension roller mounting bolt and weaken the timing belt tension. Remove the belt from the toothed pulleys.
During the entire operation, we make sure that the marks are not lost.
Replacing the idler and drive rollers
According to the service instructions, rollers change simultaneously with the timing belt. When installed, a fixing compound is applied to the thread. The support roller is twisted until the thread is fixed, the tension roller is only getting profit.
Installing a new belt
We check the correctness of the installation of all labels. Then we put on the belt in strict sequence. First, we put it on the crankshaft from the bottom up. Holding the tension with both hands, we put the belt on the water pump pulley. Then we put it on the tension rollers at the same time. Stretching the belt up and to the sides, carefully put it on the camshaft gears.
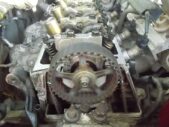
We expose the timing belt marks to the upper position
During the installation of the belt, the partner monitors the position of the marks. In case of displacement of at least one, the belt is removed, and the installation procedure is repeated.
Timing belt tension
With a special wrench or pliers for removing the retaining rings, we turn the tension roller, increasing the belt tension. For this, special grooves are provided in the roller. We tighten the belt until the marks on the roller match (the groove on the cage and the protrusion on the bushing).
Finally, tighten the tension roller bolt. After that, to check the correctness of the installation of the marks, it is necessary to manually turn the crankshaft at least twice. The installation procedure should be repeated until the marks are completely aligned.
If the marks do not match at least one tooth of the gear, the deformation of the valves is ensured. Therefore, you should be especially careful when checking. It is also necessary to re-check the alignment of the marks on the tensioner roller.
After aligning all the marks, check the timing belt tension. We apply a force of 100 N with a dynamometer, measure the deflection with a micrometer. The amount of deflection should be within 5,2-5,6 mm.
We inspect the belt and gears for dirt and fasteners. Brush all surfaces around the belt before closing the lid. Do not forget to install the plug in the sight glass of the clutch housing.
Carefully install the alternator drive belt pulley. We tighten his belt, trying not to hook the timing drive. We tighten the lid, start the engine.
All work on replacing the timing belt can be done independently. However, if you are in doubt about your qualifications, please contact the service.

Questions and answers:
How often do you need to change the timing belt on the Priora? There are no emergency niches in the pistons of the Priorovsky motor. If the timing belt breaks, the valves will inevitably meet the piston. To avoid this, the belt needs to be checked or changed after 40-50 thousand km.
Which company to choose a timing belt for prior? The base option for the Priora is the Gates belt. As for the rollers, compared to the factory ones, Marel KIT Magnum works better. In some cases, they require the addition of a lubricant.