Replacing the lambda probe - step by step instructions
Content
Lambda probes play a special role in many vehicles. They are responsible for creating the correct air/fuel mixture needed to ignite the car and therefore keep it running. Damage to the lambda probe is usually very fast and clearly visible. We will show you how to recognize damage and defects in the lambda probe, how to replace the lambda probe and what you should always pay attention to when replacing it.
Lambda probe and its functions in detail
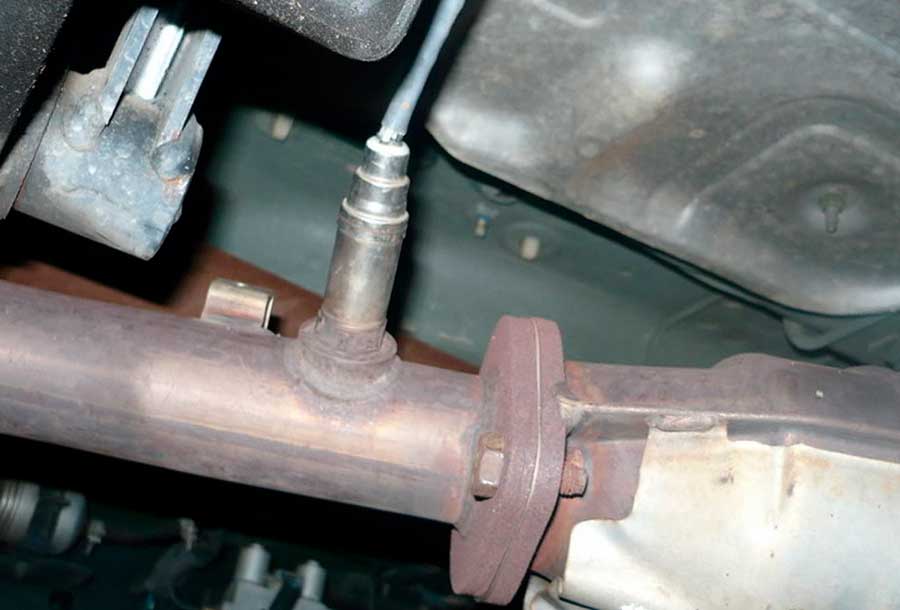
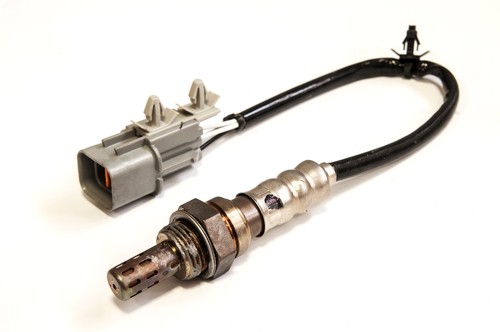
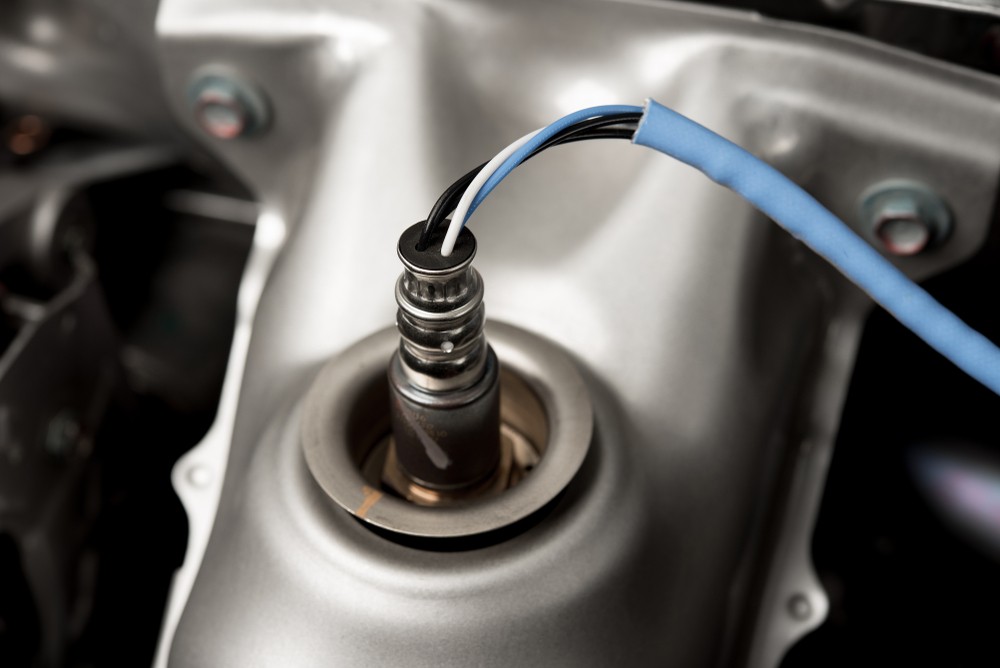
The lambda probe is installed in the exhaust system of the engine and is exposed to both heat and moisture. .
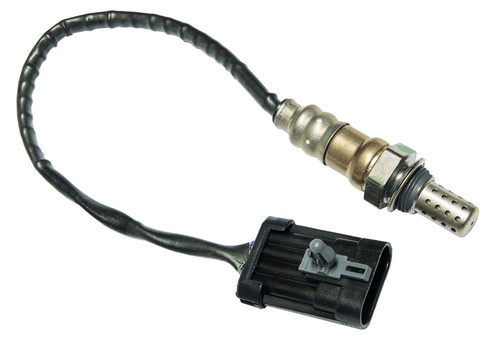
Lambda probe performs an important function . It controls the composition of the air-fuel mixture for the engine and thereby ensures its smooth operation.
If the lambda probe fails , he can no longer perform his task. The entire engine system is out of balance. If the damage is not repaired, the engine system may be damaged in the long run. For this reason you must take action as soon as possible in the event of a malfunction of the lambda probe.
Symptoms of a malfunctioning lambda probe
There are some symptoms and signs that indicate a malfunctioning lambda probe. It is important to know that some of these symptoms may occur with other types of injury. Therefore, you should look for a combination of individual symptoms or check not only the lambda probe, but also other possible sources of malfunction, just in case.
Symptoms include:
- The car accelerates much worse than usual.
- Vehicle jerks when accelerating.
– Vehicle performance decreases above a certain speed.
– At idle or while driving, you may notice a significant increase in exhaust emissions.
– The vehicle engine goes into emergency mode under load.
– The fuel consumption of your car has increased significantly.
– The exhaust emission values of your vehicle are above the norm.
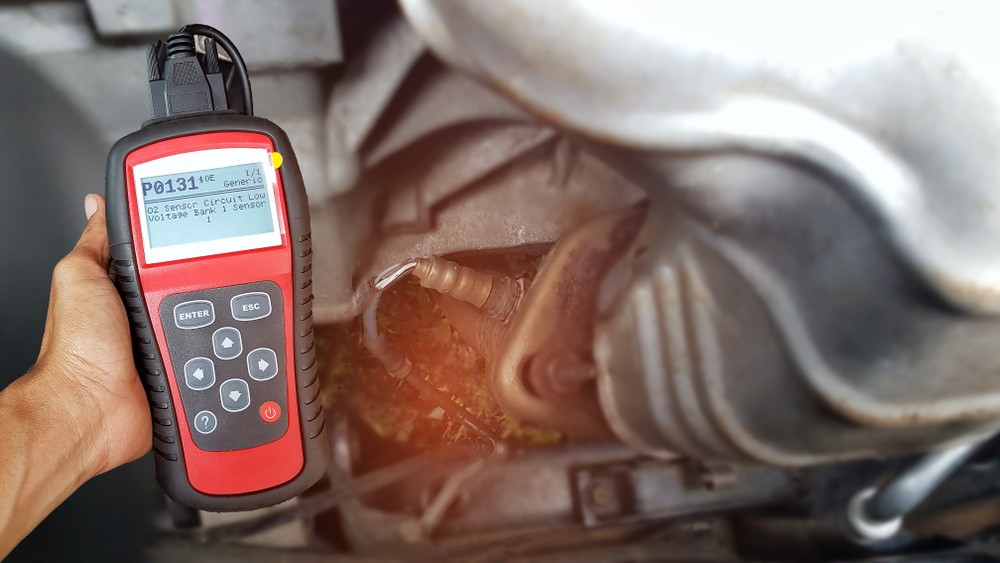
– The check engine light on the instrument panel comes on.
If only one of these symptoms occurs, it may at first be explained by chance. However, if the symptom persists or is accompanied by other signs, there are many signs of a faulty lambda probe in your vehicle.
A defective lambda probe must be repaired as soon as possible.
If the lambda probe is faulty , you must repair the damage or repair it as soon as possible. Due to incorrect air-fuel mixture your car will no longer show its full potential.
Moreover , engine damage may occur in the long term, which will also require expensive repairs.
In general, replacing a lambda probe does not require much effort, so there are no arguments against a quick and quick replacement. However, remember that the new lambda probe is quite sensitive. Therefore, do not unpack it until the old sensor has been removed. This way you can avoid unintentional damage.
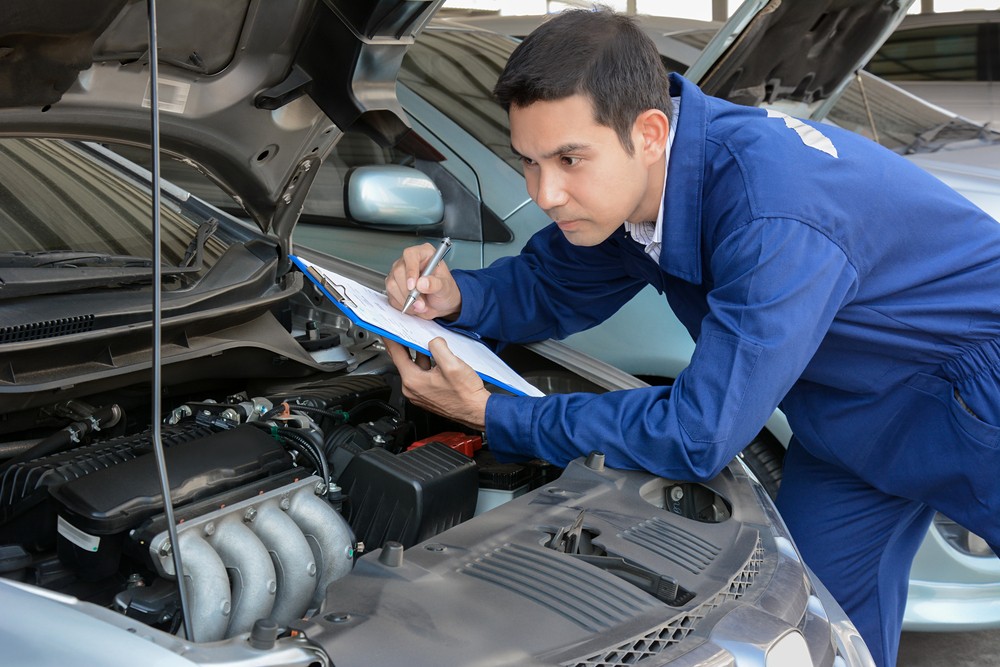
Workshop or DIY: which is better?
- In principle, the removal and replacement of the lambda probe does not require much effort. .
- However, this can vary from vehicle to vehicle and type to type. Specialized workshop can often make a replacement in a very short time.
- But if you like to work with your vehicle yourself and have the right tools at hand, there's no reason not to replace it yourself. From a technical point of view, the replacement is not associated with any difficulties. .
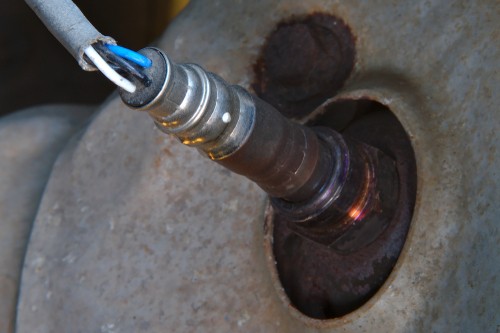
- Nevertheless , rust can form very quickly on the lambda probe due to its position. The older the vehicle and the longer the sensor has been in service, the greater the likelihood of problems during removal. In this case, a little patience and effort is important.
Is the lambda probe a wear part?
Actually, lambda probes are not wearing parts, because there is nothing to wear out on them.
However, the sensors are installed in the car's exhaust system and are exposed to both constant moisture and intense heat. . Therefore, the breakdown of the lambda probe is not so uncommon. However, there is no indication as to when the lambda probe should be replaced. Lambda probes are those components that should be replaced only in the event of a malfunction.
The following tools are required for replacement:
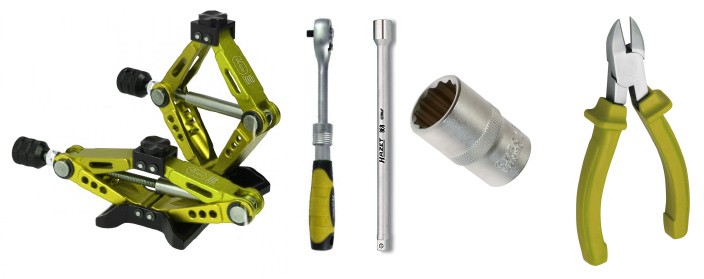
– Jack with safety device or lifting platform
– Ratchet 1/4
in. - 1/4 in. extension
– Socket size 10
– Side cutter if necessary
Replacing the lambda probe: step by step
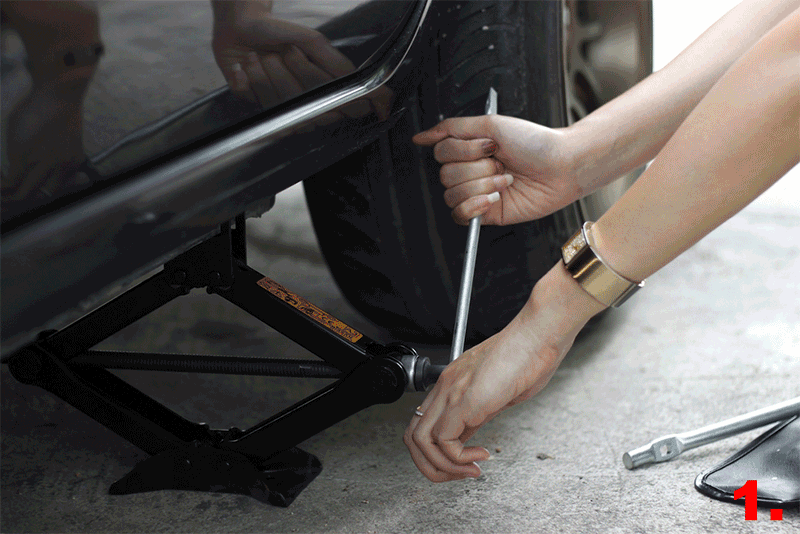
| – First, the vehicle is lifted using a lifting platform. – Alternatively, a combination of jack and safety device also works. – Now remove the black protective cover of the connector. – To do this, use a 1/4" ratchet, a 1/4" extension and a 10 socket. – Both M6 nuts must be unscrewed. – Now loosen the lambda probe plug. - The lambda probe itself is usually very tight. – Loosen the lambda probe using the ring spanner. To do this, disconnect the connector. – If the lambda probe is loose, it can be removed. – Remove the transport protection of the new lambda probe. – Screw in the new sensor and install the connector. – Install the cover. – Finally, erase the vehicle's fault memory or delete it. |
When replacing the lambda probe, pay attention to the following.
| - Do not use force. The sensor and associated holder must be handled with care. – Do not use a rust remover on an old lambda probe. It should not get on the new sensor. – In case of extremely severe corrosion, the exhaust pipe must also be removed. |
Costs to Consider
| When all you need is a new lambda probe, the costs are obvious. Depending on the type of car, manufacturer and model, prices for a new sensor range from 60 to 160 euros. Only in very rare cases, prices for a lambda probe exceed 200 euros. However, this is only the cost of the spare part. If you are replacing in a workshop, labor costs will also be added. However, the sensor can be replaced in a few minutes if there is no severe rust formation. So expect workshop replacement costs to average €80. But these costs are associated not only with the replacement. For this price, most workshops also do a direct test and cleanup, as well as a fault memory test and clear it. This means that after visiting the workshop, there will be no error messages on your car. |