Do-it-yourself installation and connection of the car radio
Content
- The size and types of car radio
- What you need to install
- Car radio connection: connection diagram
- Connecting a radio with a standard connector
- Connecting a radio without a connector
- Speaker connection
- Installing an active antenna
- DIY video instructions for installing and connecting a car radio
- Checking the connection
- Potential problems and how to solve them
- Questions and answers:
Music in the car for a music lover is an integral part, without which he will never hit the road. However, in addition to recording songs of your favorite artists, you need to take care of the playback quality. Of course, due to poor noise insulation in an old car, this is almost impossible to achieve without installing an amplifier, but this is us already discussed before.
Now let's take a closer look at different options for connecting a car radio. If not properly connected, it will randomly shut down, drain battery power even when turned off, etc.
The size and types of car radio
Before proceeding with the consideration of connection methods, a little about the types of devices. There are two categories of car stereos:
- Established. In this case, the radio tape recorder will have non-standard dimensions. If you need to replace the head unit, you will need to purchase the original, but most often its cost is high. The second option is to buy a Chinese analogue, but basically the sound quality will be poor. It will not be difficult to connect such a model, because all connectors and dimensions coincide with the standard wiring and the place on the console in the car;

- Universal. Such a car radio has certain dimensions (in the documentation they are indicated by the abbreviation DIN). The connection is most often standard - through the ISO chip. If a non-standard connection is used in the car's wiring, then you should carefully read the diagram indicated by the car manufacturer (there may be a different number of wires or their colors).
Details about the parameters of the players discussed in a separate review.
What you need to install
To correctly connect musical equipment, it is important not only to choose a model in size, but also to prepare the necessary instruments. For this you will need:
- Stationery or construction knife (they have the sharpest blades) for cleaning contacts;
- Pliers are needed to crimp the chips on the wires;
- Screwdriver (depends on the type of clips);
- Insulating tape (needed if there are no mounting and insulating chips in the car wiring);
- It is better to purchase a sound (acoustic) wire separately, since the set includes a lower quality analogue;
- If there is no standard connector with the corresponding grooves, you will need a multimeter to determine the correspondence of the wires.
The manufacturer provides a detailed installation diagram for each radio tape recorder.
Car radio connection: connection diagram
The player in the vehicle can be connected to the vehicle electrical system in different ways. Although they differ from each other, the basic layout remains the same. The only thing that makes them different is how energy is supplied to the tape recorder. When connecting a car radio, it is important to follow the manufacturer's recommendations, which are indicated in the technical documentation of the vehicle.
The device is powered according to the following scheme:
- In most head unit models, the positive wire has two different cores that are connected to separate terminals: one yellow and the other red. The first one is needed so that the settings do not get lost when the tape recorder is turned off. The second allows you to turn off the player if you do not need its work;
- The minus is mostly represented by a black cable. It is screwed onto the car body.
Here are some of the head unit mounting features.
Wiring diagram with ignition lock
The safest connection scheme is to supply power through the contacts in the ignition switch. If the driver accidentally forgets to turn off the player, the audio system will not drain the battery. It should be noted that the advantage of this method is its key disadvantage - the music cannot be listened to if the ignition is inactive.
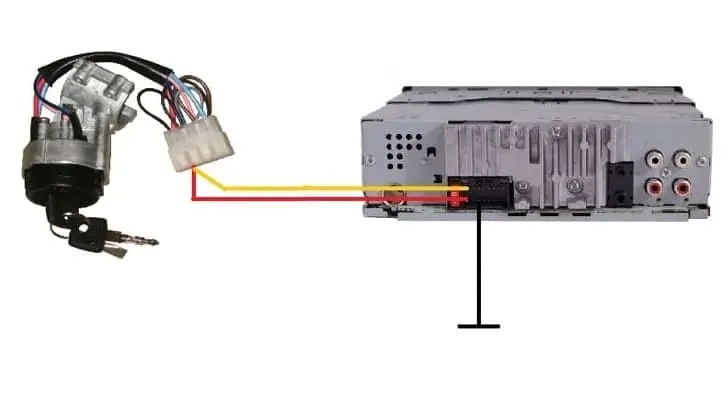
In this case, to play music, you need to either start the engine so that the generator charges the battery, or be ready to plant the battery. The installation option for the ignition switch is as follows.
The yellow cable sits on the positive terminal of the vehicle's on-board power supply. The red one is opened by the contacts of the lock, and the minus - sits on the body (ground). Turning on the radio will be possible only after turning the contact group.
Connection diagram directly to the battery
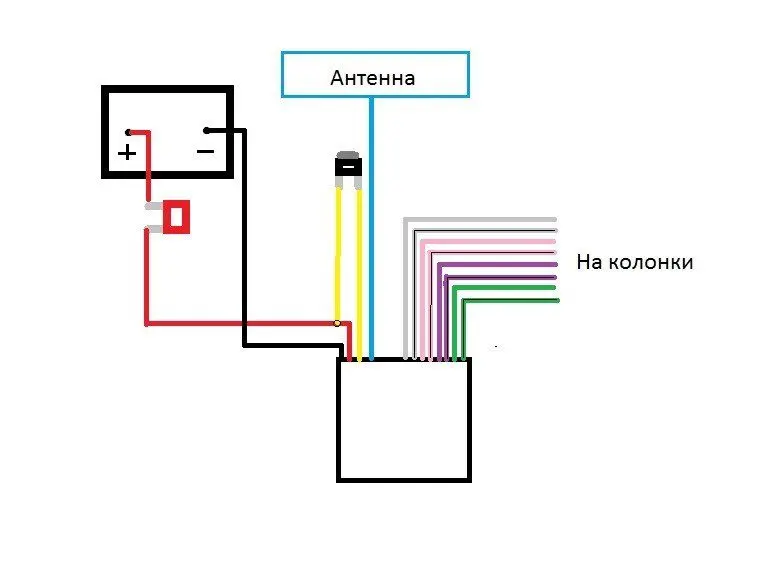
The next method is used by most car enthusiasts. This is the easiest way to power the radio. In this version, the positive terminal is connected to the red and yellow wires, and the black one is connected to the vehicle ground.
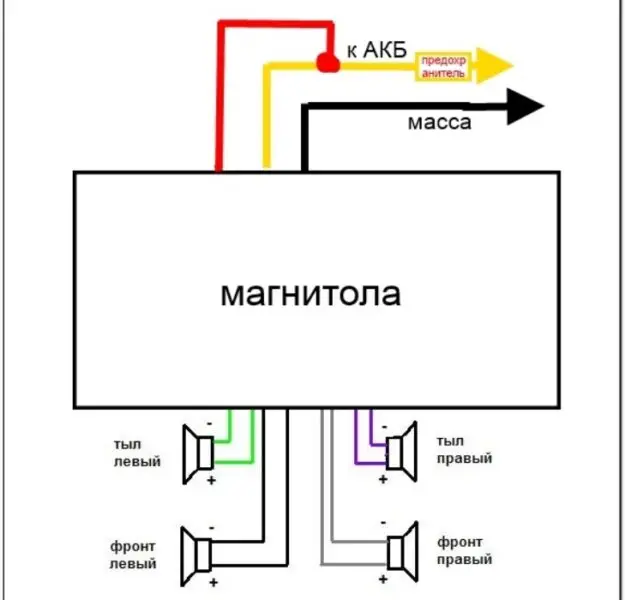
The advantage of this method is that even when the ignition is off and the engine is not working, music can be played. But at the same time, the switched off radio tape recorder will still discharge the battery. If the car does not drive often, then it is better not to use this method - you will have to constantly recharge the battery.
Connection method using a button instead of the ignition switch
The next installation method is through breaking the positive contact with a button or toggle switch. The circuit is identical to the one mentioned at the very beginning of the list, but instead of ignition, the red wire is opened by the button contacts.
This method is the most effective for music lovers who rarely drive a car. The turned off button will not allow the radio tape recorder to discharge the battery, but if desired, the driver can listen to music even when the car ignition is deactivated.
Connection method using alarm
Another way that you can use to safely connect the radio is through an alarm system. With this method, the device also does not discharge the battery. The principle of deactivating the player - while the alarm is active, the radio tape recorder does not work.
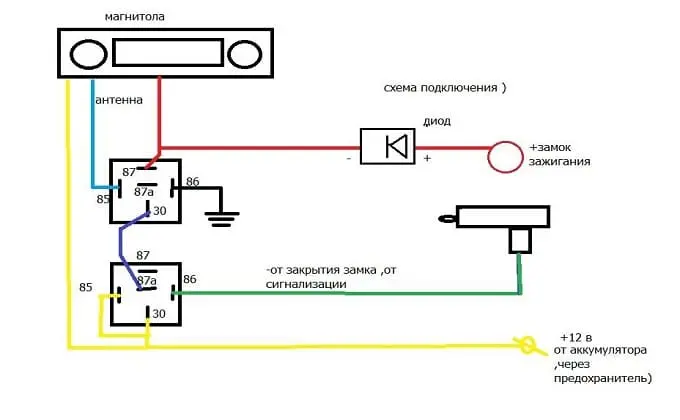
This method is the most difficult and if there is no experience in connecting electrical devices, it is better to ask for help from an auto electrician. In addition, the wiring of some vehicles may differ from the color schemes shown on the Internet.
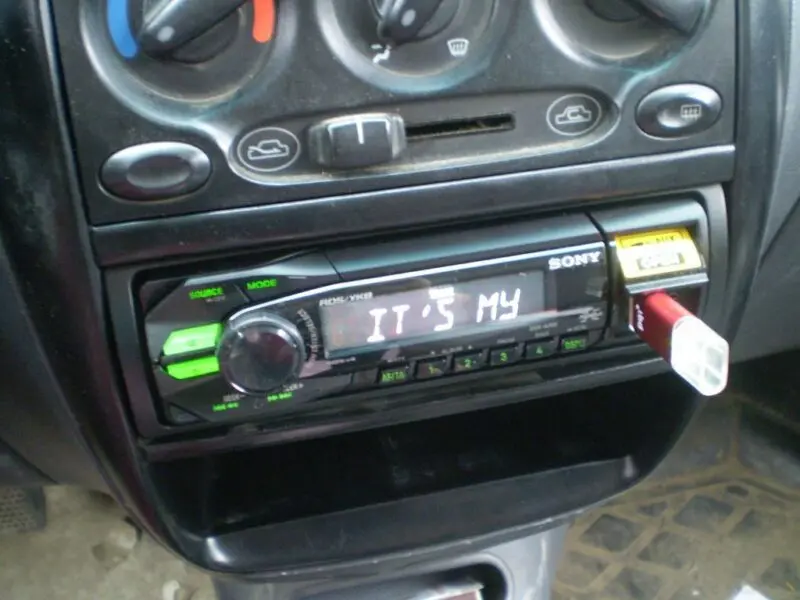
Connecting a radio with a standard connector
Almost every high-quality car radio is equipped with standard connectors that make it easier to connect the head unit to the car's on-board system. Many models are designed according to the Plug & Play principle, that is, so that the user spends a minimum of time connecting the device.
But even in this case, there are some nuances. And they are related to what kind of radio was installed before.
There is a connector on the machine
There will be no problems with connecting a new radio tape recorder if the civilian model changes to an analogue with the same pinout of the connector (the color of the wires and the purpose of each of them is the same). If a non-standard car radio was installed on the car, then there is a possibility that the connectors in it and the new device will not match.
In this case, you will either need to replace the standard connector with an analog that comes with the radio tape recorder, or connect each wire directly to the radio tape recorder in accordance with the device manufacturer's instructions.
There is no connector on the machine
In some cases, after purchasing a car (most often this happens when performing a transaction in the secondary market, and with old cars), it becomes obvious that the past motorist is not a fan of music in the car. Or the automaker does not provide for the possibility of installing a radio tape recorder (this is extremely rare in modern cars).
The way out of this situation is to connect the connector from the radio to the vehicle wiring. For this, it is more practical to use not twists, but soldering so that the wires do not oxidize during the operation of the player. The main thing is to connect the wires in accordance with the pinout indicated on the diagram that comes with the radio tape recorder.
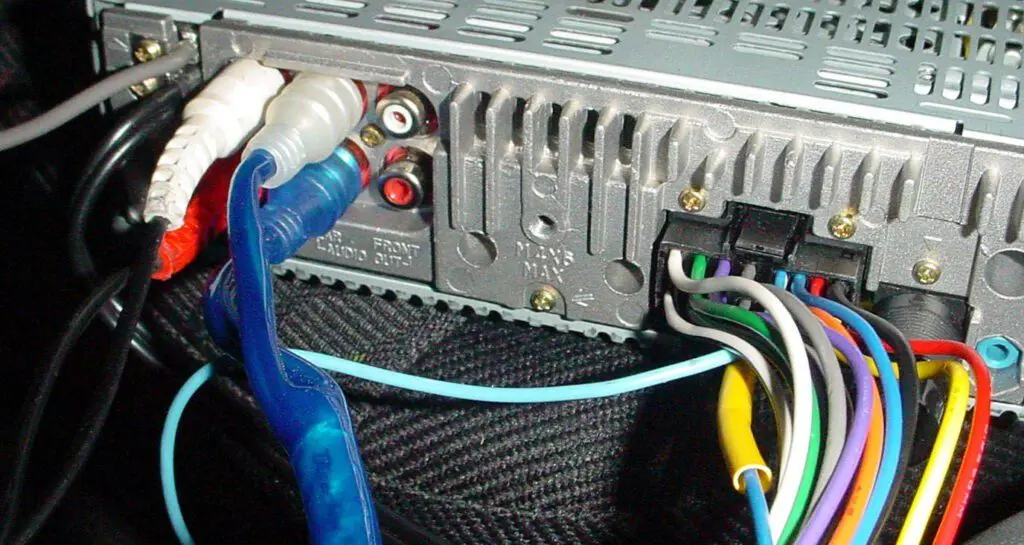
Connecting a radio without a connector
Often, Chinese budget car radios are not sold with connectors included. Most often, such products are sold only with viscous wires. Here are some guidelines for connecting such equipment.
There is a standard connector on the machine
If a modern radio has already been used in the car, then it would be better to use the existing connector. In order not to violate the integrity of the wiring, when buying a radio without a contact chip, it is better to buy an empty connector, connect the wires in it in accordance with the diagram on the device and connect the connectors together.
In all new car radios (even in the budget version) there is a pinout diagram, or the appointment of specific wires. It can be glued to the radio cassette or included as an instruction manual. The main thing is to carefully connect each wire to the corresponding connector.
There is no connector on the machine
Even in this situation, you can competently connect the head unit to the on-board system of the car, without having the education of an auto electrician. To do this, you may need to buy two connectors ("male" and "female"), correctly connect the wires in each of them to the radio, to the car wiring and to the speakers. This method is more practical than dead twisting or direct soldering, because if you need to replace the device, it will be enough to simply disconnect the chips and connect a new tape recorder.
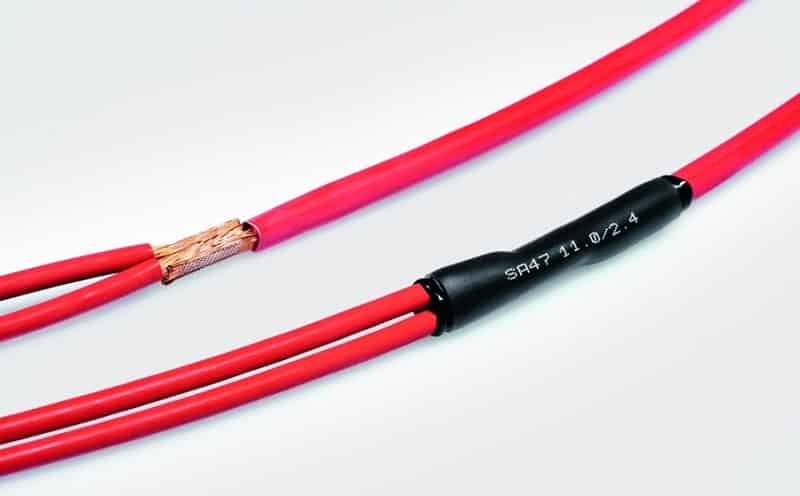
If soldering or twisting is used (the simplest option), then at the place of connection of the wires it is necessary to use heat-shrinkable cambric. It is a hollow elastic tube. A part is cut from it that exceeds the size of the bare wires. This piece is put on the wire, the cable is connected, the cambric is pushed onto the place of insulation, and it is heated with fire. Under the influence of high temperature, this material deforms, tightly squeezing the junction, like electrical tape.
Here is a table that indicates the purpose of specific wires (for most car radios):
| Color: | Purpose: | Where it connects: |
| Yellow | Positive wire (+; BAT) | Sits on the positive terminal of the battery through a fuse. You can stretch an individual cable. |
| Red | Positive control wire (ACC) | It is connected to the positive terminal of the battery, but through the ignition switch. |
| Black | Negative wire (-; GND) | Sits on the negative terminal of the storage battery. |
| White / with stripe | Positive / negative wire (FL; FrontLeft) | To the front left speaker. |
| Gray / with stripe | Positive / negative wire (FR; FrontRight) | To the front right speaker. |
| Green / with stripe | Positive / negative wire (RL; RearLeft) | To the rear speaker on the left. |
| Purple / with stripe | Positive / negative wire (RR; RearRight) | To the rear speaker on the right. |
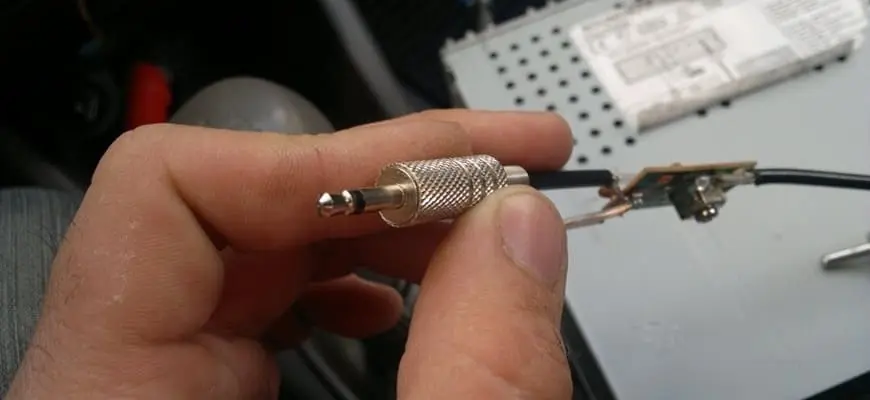
The car may use signal wires that do not match the pinout on the radio. Determining which one goes where is easy. For this, a separate wire is taken and connected to the signal output from the radio. In turn, both ends are connected to the wires, and it is determined by ear which pair is responsible for a particular speaker. To avoid confusing the wires again, they must be marked.
Next, the polarity of the wires is determined. This requires a conventional finger-type battery. It is applied to each pair of wires. If the positives on the battery and on a certain wire coincide, the diffuser in the speaker will pulsate outward. When the plus and minus is found, they also need to be marked.
The same method can be used to connect the car radio if the car uses a separate battery. In this case, it is also necessary to take into account which speakers will be used during the operation of the radio. Regardless of whether these are standard speakers or not, you should check whether the resistance and power on them and on the radio tape recorder match.
Speaker connection
If you connect the speakers to the tape recorder incorrectly, this will greatly affect the quality of sound effects, which are given a lot of attention by real car audio gurus. Often, an error leads to a breakdown of the sound-reproducing device or the player itself.
The set with the new speakers also includes instructions on how to connect them correctly. You should not use the wires that come with the kit, but rather purchase an acoustic analog of a larger section. They are protected from extraneous interference, which will make the sound clearer.
Each speaker has a different contact size. Wide is a plus, narrow is a minus. The acoustic line should not be long - this will negatively affect the purity and loudness of the music.
At the connection points, you should not use twists, but it is better to buy the terminals intended for this. The classic connection is two speakers in the back, but most radio tape recorders also have connectors for front speakers, which can be installed in the front door cards. Instead of standard speakers, you can connect transmitters or tweeters to these connectors. They can be attached to the dashboard in the corners near the windshield. It all depends on the driver's musical preferences.
Installing an active antenna
The vast majority of car radios have a radio function. The standard antenna included in the kit does not always allow you to pick up a weak signal from a radio station. For this, an active antenna is purchased.
In the market for car accessories, there are many different modifications in terms of power and shape. If purchased as an interior model, it can be placed on top of the windshield or rear window.
The zero (black) cable is fixed on the car body as close to the antenna as possible. The power cable (most often it is red) connects to the ISO chip.
The signal wire is connected to the antenna connector in the radio itself. Modern antennas do not have a plug for the signal wire, but they are freely sold at any radio store.
Learn more about the types of antennas and how to connect them Read here.
DIY video instructions for installing and connecting a car radio
As an example, watch a video that shows how to correctly connect a car recorder to the vehicle's on-board network. The review also shows how the speakers are connected:

Checking the connection
Do not think: since the car radio uses only 12V voltage, then nothing terrible will happen if you somehow connect it incorrectly. In fact, a serious breach of technology can have serious consequences.
Unfortunately, some motorists carefully study the instructions only after a failed attempt to correctly connect the device, and as a result, the radio tape recorder either completely burned out, or a short circuit occurred in the car.
We will talk about the symptoms and consequences of incorrect connection of the device a little later. Now let's focus a little on some of the intricacies of this procedure.
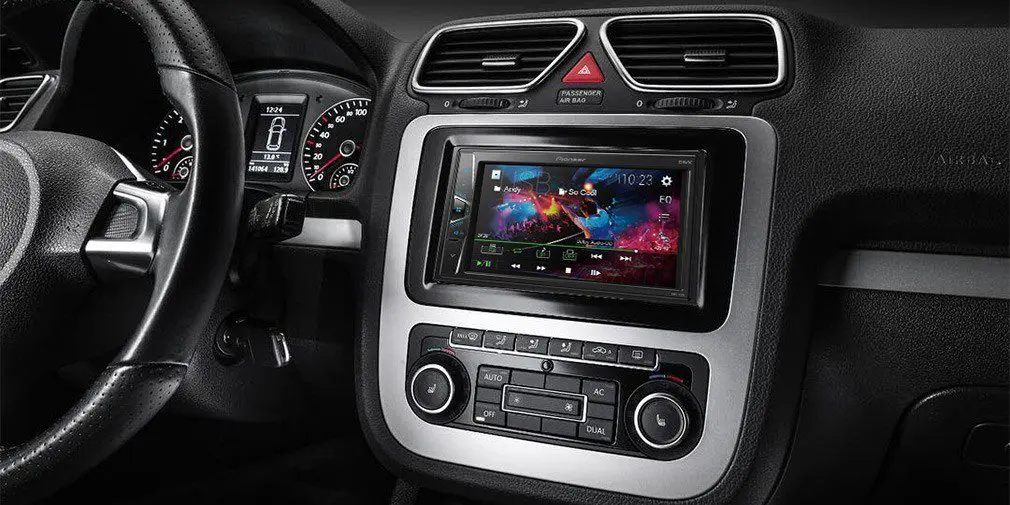
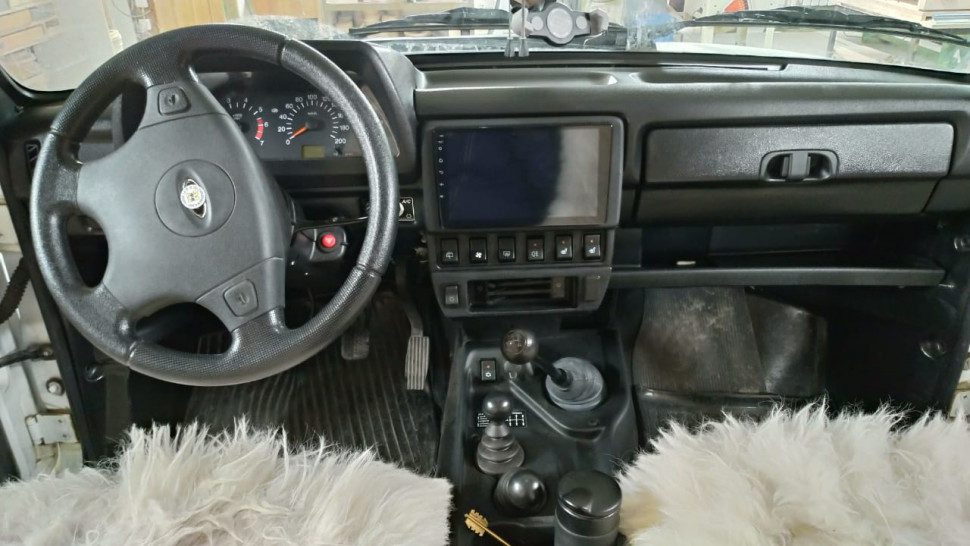
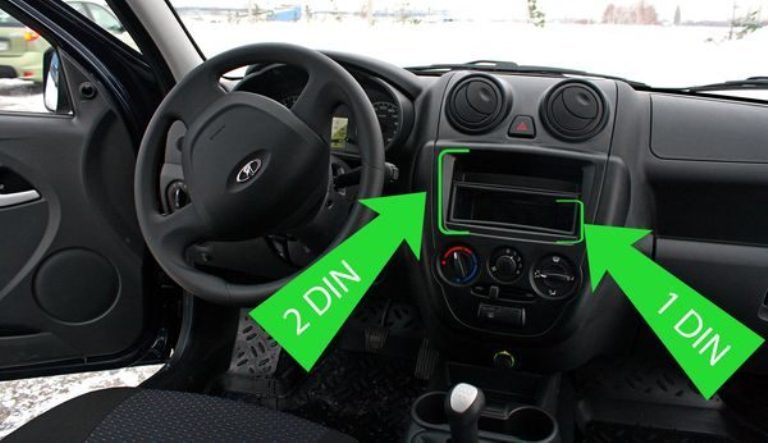
Installing and connecting a 2 DIN radio in the car
As we have already paid attention to, DIN is the parameters of the dimensions of the device. It is easier to fit a smaller car radio into a larger frame. To do this, of course, you will need to install a stub. But as for the opposite, here you will need to tinker a little. It all depends on the features of the car's center console.
If the seat allows for some modernization (to increase the opening to accommodate a larger device), then you need to carefully cut out the seat for a radio tape recorder with an increased size. Otherwise, the installation of the equipment is almost identical to the installation of a classic radio tape recorder.
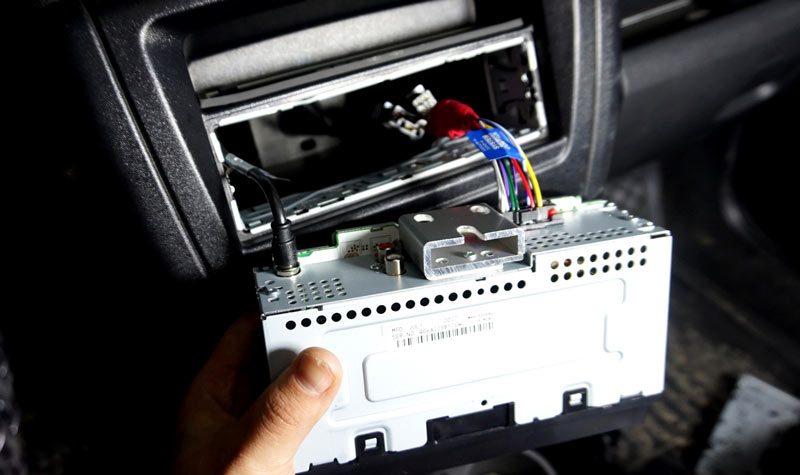
If a similar car radio has already been used in the car, then this is much easier to do. As in the case of the 1DIN variant, this radio is fixed in the center console using a metal shaft. The fixing method may differ. These can be folded petals, there can be latches or screws in general. In most cases, the turntable itself is held by side spring-loaded latches.
In some cars, a module with an opening for mounting a 1DIN radio tape recorder is installed on the center console, under which there is a pocket for small things. In this case, the module can be dismantled, and a large radio tape recorder can be installed in this place. True, with such a non-standard installation, you will need to think about how to hide the discrepancy in the dimensions of the elements. To do this, you need to choose the appropriate decorative frame.
Installation and connection of a radio tape recorder to Lada Grant Liftback
For Lada Granta Liftback, the default is a car radio with a typical size of 1DIN (180x50mm). For all car radios with such dimensions, installation will require a minimum of time. Otherwise, some changes will need to be made in the center console, since the height of such a device is twice as large.
In most models, the factory harness makes it as easy as possible to connect the car wiring with the signal and power cables of the head unit. Installation of a standard radio is carried out in the following sequence:
- The cover pocket is hooked onto its edge;
- The clamps holding the front frame are detached;
- The connector connecting the wires is disconnected;
- The glove compartment case is folded back. There are travel stops at the top of the rear wall of this element. They need to be unhooked from the dashboard;
- Carefully pulling the cover towards you, you need to disconnect it from the panel;
- To make it easier to pull the wiring harness to the radio (it is inconvenient to connect the chips behind the panel), it is necessary to raise the floor covering from the front passenger side;
- A standard assembly shaft is being installed with bendable clamps that will hold the new radio tape recorder.
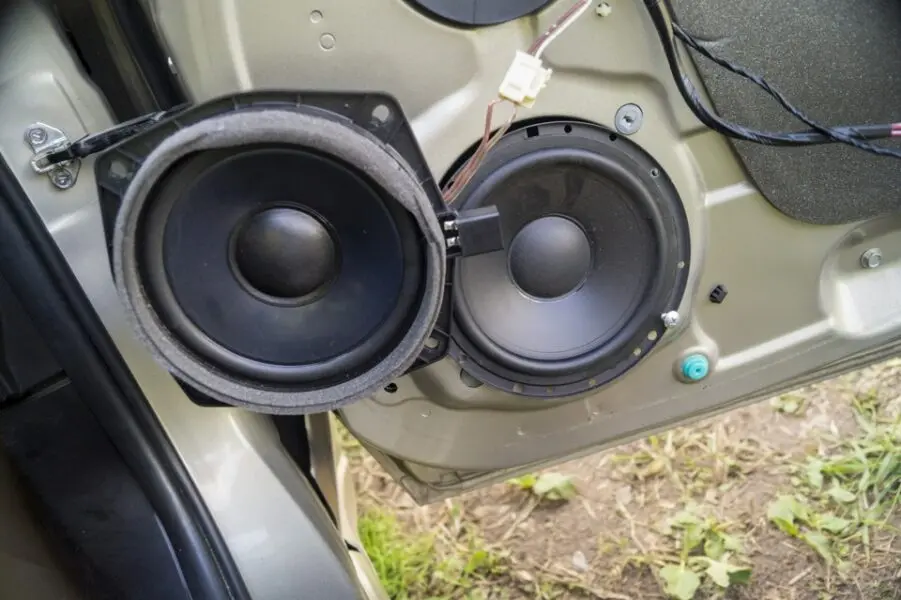
Next, the speakers are connected. Lada Grants Liftback has a standard acoustic wiring. It is located behind the door cards. Removing the trim reveals the 16-inch speaker holes. If they are not there, or they are of a smaller diameter, then they can be increased.
In the door card itself, the hole must match the diameter of the speaker cone. It is much more difficult to install columns with a smaller diameter. For this reason, be careful about the dimensions of the new speakers. The mounting plate and decorative mesh should protrude as little as possible from the door card so that it does not interfere with opening the glove compartment. Rear speakers come in a variety of sizes.
The radio is connected to the mains through the universal ISO connector. It is considered international, therefore it fits most car radio models. If the new head unit uses a different connector, a special ISO adapter must be purchased.
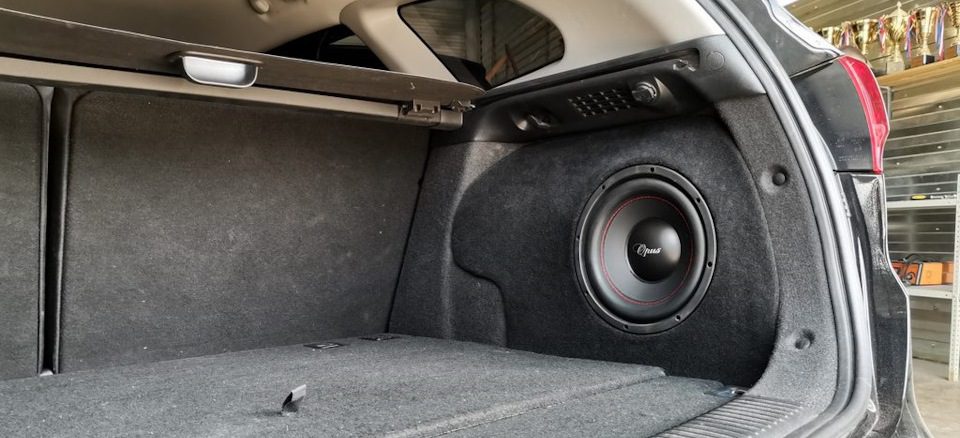
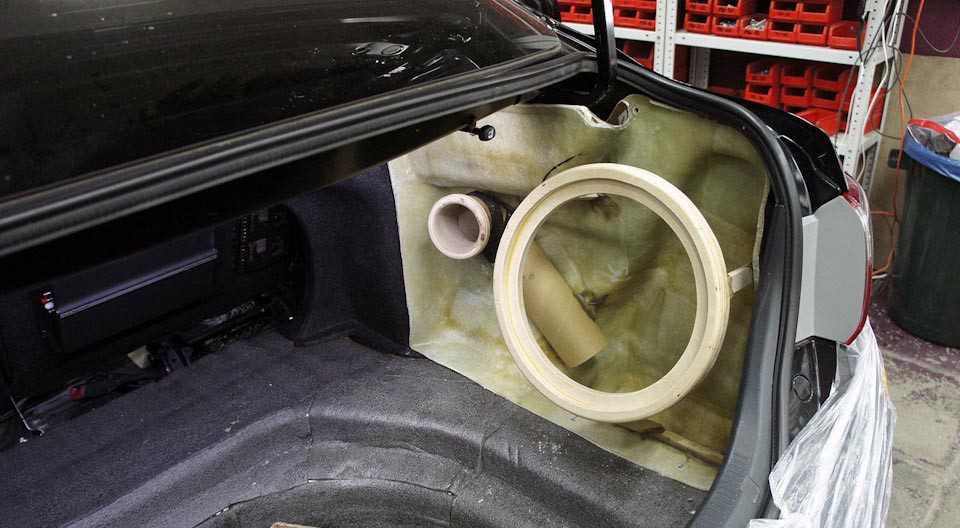
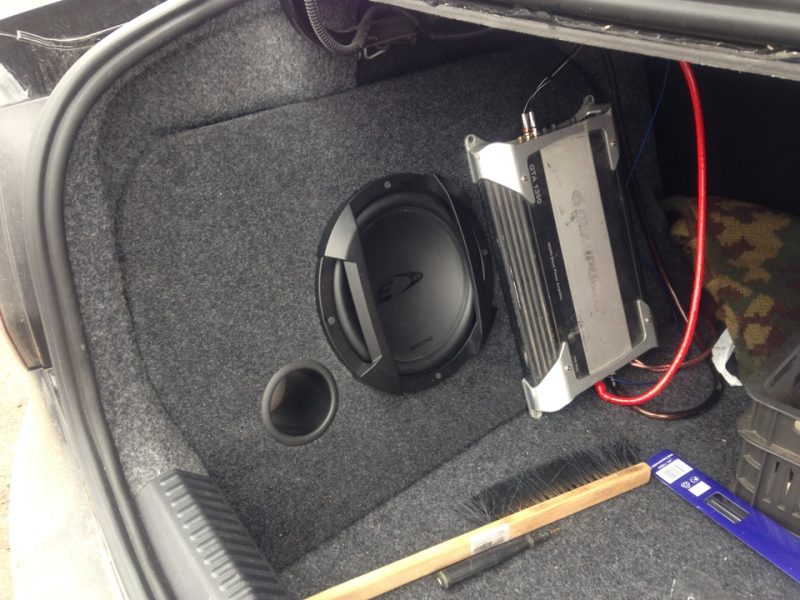
Making a case for a Stealth subwoofer with your own hands
The peculiarity of this type of subwoofer is that it takes up little space. If ordinary subs have an open shape (installed between passenger seats, on the rear shelf or in the center in the trunk), then this one is completely hidden, and at first glance it seems like an ordinary column.
Before installing the Stealth subwoofer, you need to prepare a place for it, enough time (polymerization of each layer of fiberglass takes several hours) and materials. This will require:
- Fiberglass (T13). This material is used for the manufacture of durable elements of the boat body or is actively used in auto tuning;
- 1-3 kilograms of epoxy glue;
- The base on which the speaker will be fixed is plywood, chipboard, MDF or OSB. The thickness of the slab should not be less than 0.8cm;
- Masking tape tape size - 50mm (roll length - 50m.). it is better to take with a margin - 2 rolls;
- Carpet - the material with which the trunk is sheathed;
- Glue to fix the carpet on the surface of the structure (liquid nails);
- Impregnation for wood products - primer or drying oil (so that the plywood does not absorb moisture from the trunk);
- Putty for wood products. It will need to be used to eliminate surface irregularities before pasting the carpet;
- Jigsaw for cutting out structural parts, as well as holes for the column.
The most difficult thing in this case is making a place for mounting a bass speaker. First of all, it should be remembered that the cavity should not be small. Otherwise, the vibrations of the diffuser will collide with the resistance of the air inside the box, and the driver will not be able to fully enjoy the audio composition.
It should be noted that the manufacturer recommends its own cavity volume for each speaker diameter. To make it easier to calculate the volume of a complex structure, some experts conditionally divide it into simpler geometric shapes. Thanks to this, you can not use complex formulas, but simply add the results from familiar formulas, for example, the volume of a parallelepiped, a triangular prism, etc.
Next, we choose the place to install the subwoofer. Here are the main factors to consider when doing this:
- The structure should take up a minimum of the trunk volume;
- Once manufactured, the box should be similar to factory equipment - for the sake of aesthetics;
- The subwoofer should not interfere with simple operations (take out a spare wheel or find a toolbox);
- Many people believe that the ideal place for a sub is a spare wheel niche. In fact, this is not the case, because during installation or use, an expensive speaker can be damaged.
Next, we form the enclosure for the subwoofer. First, the base for the fiberglass wall is created. This requires masking tape. With its help, the desired shape is created, on which the fiberglass will subsequently be applied. By the way, this material is sold in rolls, the width of which varies from 0.9 to 1.0 meters.
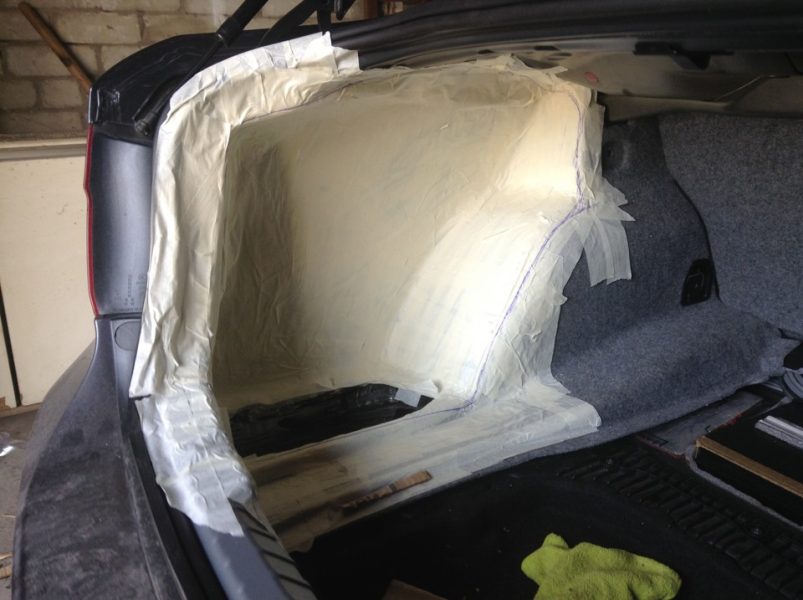
To prevent the paper from absorbing the epoxy, it must be covered with paraffin or another similar material (stearin or parquet polish). Epoxy resin is mixed (the manufacturer indicates this in the instructions on the container). The first layer of resin is applied to the paper base. It needs to dry. Then another layer will be applied to it, and then the first layer of fiberglass.
The fiberglass is cut to the size of the niche, but with a small margin, which will be cut off after polymerization. Fiberglass should be laid with a coarse brush and roller. It is imperative that the material is completely saturated with resin. Otherwise, the finished case will delaminate as a result of constant vibration.
To make the cavity of the subwoofer cabinet strong, it is necessary to apply 3-5 layers of fiberglass, each of which is impregnated with resin and polymerized. A little trick: to make it convenient to work with epoxy resin, and not to breathe in its vapors, after the first layer hardens, the structure can be removed from the trunk. Then the work on creating the hull is carried out by applying layers on the outside of the structure. Important: polymerization of each layer is not a quick process, so it takes more than one day to create the base of the subwoofer enclosure.
Next, we move on to making the outer cover. The cover must completely cover the outside of the enclosure. A podium for the speaker is created. These are two wooden rings: their inner diameter must match the diameter of the column. The hole diameter of the cover must be less than the column diameter. After the lid is made, its surface is leveled with a wood putty.
To eliminate unevenness after the spatula, the dried surface is sanded with sandpaper. To prevent the tree from absorbing moisture, which is why it will subsequently exfoliate, it must be treated with a primer. After the work has been completed, the podium is glued to the lid.
Next, the lid is pasted over with a carpet. To do this, the canvas is cut taking into account the curl to the inside. The glue is applied in accordance with the instructions on the package with the glue. To prevent creases on the carpet, the material must be straightened from the center to the edges. For maximum fixation, the material must be pressed firmly.
The last step is to install the speaker and fix the structure. First, a hole is made in the fiberglass part of the structure through which a wire will be threaded inside. The speaker is connected, and then screwed to the box. The box itself is fixed in a niche with self-tapping screws.
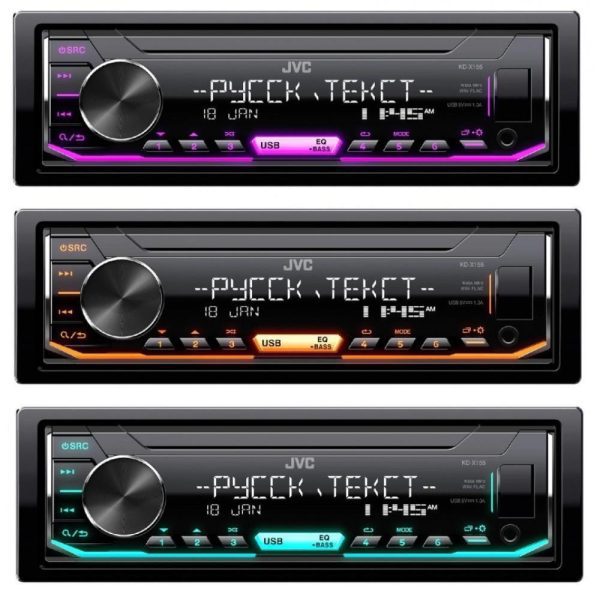
User manual of car radio JVC KD-X155
JVC KD-X155 is a 1DIN size car radio. It contains:
- MP3, WMA, AAC file player;
- Built-in amplifier (rated power 4 * 22; peak power 4 * 50 W);
- Audio equalizer (12 presets);
- IPhone / iPod support;
- Monochrome display;
- Automatic adjustment of brightness and backlight color;
- Supports steering joystick connection;
- Automatic search for radio stations;
- Pause playback when the phone rings;
- USB-input (on the front panel);
- AUX audio input (on the front panel);
- PreAmp Out (Rear) PreAmp (subwoofer);
- ISO type connection;
- Supports RDS, RDS / EON, RDS / PTY;
- Switching modes stereo / mono;
- Long-range tuner;
- Presets on FM (18) and AM (6);
- Adjustable tone;
- 24-bit DAC;
- ID3 support;
- Tone compensation;
- There is a pre-out jack for switching between speaker (rear) and subwoofer.
This car radio transmits high-quality sound (depends on the quality of the recording itself), but with prolonged use at high volume it gets very hot, and wheezing may also appear.
To use the operating instructions, you can enter the name of the JVC KD-X155 radio in the search engine. There are many resources on the Internet that provide detailed information if the original book has been lost.
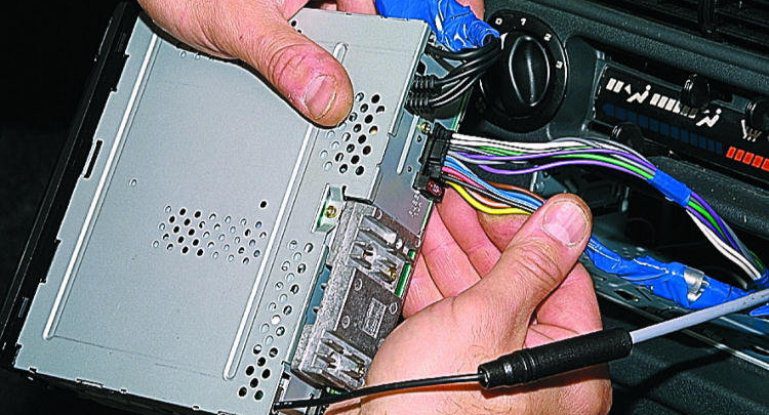
How to remove the head unit from the panel without pullers
Usually, special keys-pullers are required to dismantle a standard car radio. The need for such work may be due to the repair, modernization or replacement of the device. Naturally, a motorist may not have them, if he is not engaged in professional installation / replacement of car radios. They are needed primarily in order to reduce the possibility of theft of the device.
First, let's figure out how the device is mounted in the niche of the center console. Some (most budget models) are fastened with clips located on the sides of the radio or four latches (top, bottom and sides). The mounting module itself in the mine can be fastened with self-tapping screws, and the bracket to the radio tape recorder - with screws. There are also snap-on mounting frames. For this installation method, you need to use a rapc-adapter, which is attached to the panel.
The key that allows you to move the latches to remove the radio casing is a metal bar. It is inserted into the holes provided for it (located on the front of the device). In the case of standard turntables, the body of the device is fastened with screws to the brackets. To dismantle it, you will need to carefully remove the decorative overlays located near the niche for the tape recorder on the panel.
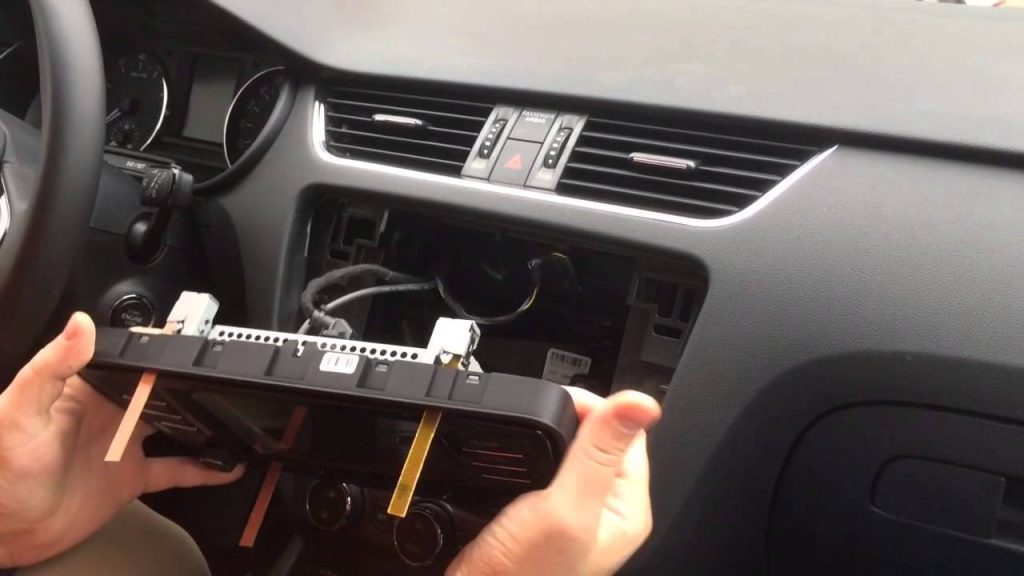
If you have a puller, the procedure is performed in the following sequence. First, the player panel is removed. Next, the plastic cover is dismantled (snap off with a flat screwdriver or a plastic spatula). One key is inserted between the mounting frame and the radio housing, and the latch lock is folded back. The second key is the same procedure on the other side. Then it is enough to pull the turntable towards you, and it should come out of the mine.
Dismantling must be done carefully, especially if you do not know how much wires are available. Pulling the radio sharply towards you can damage the wires or cut some of them. Larger devices are fixed with four latches. To dismantle them, use the U-shaped pullers by inserting them into the corresponding hole in the front of the radio.
To dismantle the head unit without keys, you can make them yourself or use improvised means (a piece of wire, a hairpin, a knitting needle, a clerical knife, etc.). Before using this or that "tool", it is necessary to assess the ability to pry the clips and remove the radio tape recorder.
Each model of the standard device has its own shape and position of the latches. Therefore, it is better to first find out where they are in order not to damage the decorative strip or panel of the device. For example, on the standard head unit of the Priora, the latches are at the level between the switching buttons of the 2nd and 3rd, as well as the 5th and 6th radio stations.

Despite the difference in the installation and fixing of standard devices, they have something in common. Usually the fixing bolt is screwed to the bracket. This element is closed with a plastic cover. Before dismantling the radio, it is necessary to remove the protective cover and unscrew the fastening screws.
Here's another subtlety. Before disconnecting the radio, it is necessary to de-energize the car - disconnect the terminals from the battery. But in some cars, the manufacturer uses a security pin code when the radio is disconnected from the car's on-board system. If the car owner does not know this code, then you need to carry out the necessary work without disconnecting the device (10 minutes after disconnecting when reconnecting, the radio tape recorder may require entering a pin code).
If the code is unknown, you should not try to guess it, since after the third attempt the device will be completely blocked, and it will still need to be taken to the dealership. Better to do it right away to save time.
Potential problems and how to solve them
Naturally, if some mistakes were made during the installation of a new radio tape recorder, this will affect the operation of the device, and in some cases even disable it. Here are some common problems after installing a new car radio and how to fix them:
| Problem: | How to fix: |
| The radio does not work | Check if the wires are connected correctly |
| There was smoke from the device and the smell of burnt wiring | Check if the wires are connected correctly |
| The radio tape recorder turned on (the screen lit up), but the music is not heard | Check the connection of the signal wires (to the speakers) or eliminate their break |
| The device works, but it cannot be configured | Check if the speakers are connected properly |
| The settings go astray every time | Check the correct connection of the ACC wire |
| Speakers do not reproduce bass well | Check the connection of the signal wires (pole mismatch) |
| Spontaneous shutdown of the device | Check the strength of the connections, the compliance of the voltage in the on-board network of the car |
| Noise is heard during music playback (if the recording itself is clear) | Check the integrity of the signal wires, their contacts or the correspondence of the voltage in the network |
| Fast battery discharge | Check the correct connection of the + and ACC wires |
| Fuse blows constantly | Device overload, short circuit or incorrect fuse rating |
Most of the problems are not so critical, and they can be easily fixed with a more careful connection of the device. But in the event of a short circuit, the radio tape recorder can not only fail, but the car can also catch fire. For these reasons, the connection of the player, especially if there is no experience in this matter, must be approached with the utmost care.
In order for the wiring to light up in the car, a current of 100A is enough, and the battery is capable of delivering up to 600A (cold cranking current). The same goes for the generator. A couple of seconds is enough for a loaded wiring for the insulation to melt from overheating or to ignite plastic parts.
Questions and answers:
How to connect a radio tape recorder so as not to plant the battery. When directly connecting the car radio to the battery, it is necessary to take into account that it will constantly be in standby mode, and in the event of a long idle time of the car, the device will drain the battery, especially if it is no longer fresh. In such a bundle, the red cable sits on the positive terminal, the yellow one also sits on the positive terminal, only through the fuse, and the black cable sits on the body (minus). So that the battery life is not wasted, you can additionally put positive wires on a button that would break the circuit. Another way is to connect the red wire of the radio to the power cable of the ignition switch. The yellow wire still sits directly on the battery through the fuse, so that when the ignition is turned off, the settings of the head unit are not lost.
What will happen if the radio is not connected correctly? If the radio tape recorder is connected "blindly" or by the "poke" method, that is, contact chips are simply connected, if they are suitable in size, that is, there is a risk of creating a short circuit due to a mismatch in the pinout. In the best case, the fuse will constantly blow or the battery will be discharged more. Failure to follow the pinout of the radio and speakers is fraught with rapid failure of the speakers.
3 comment
Mousse
Hi! I have a Ford s max 2010, I want to install a Cancellation Camera, I have a camera and any tweaks is it possible?
0465712067
Shafiq idham |
Hye… I installed jvc kd-x230 type radio on the truck when I finished installing the live radio but it did not sound… Why ye. ??
gabber pete
I want to disconnect tweeters from the car radio because I think these cause a very bad sound through the two speakers that I have mounted in the front doors.
Which cables in the back of the car radio do I have to remove (diagram or photo) to disconnect tweeters?
Removing tweeters in the dashboard is a time consuming job.