Bleeding the brakes and replacing the brake fluid
Content
- Replace motorcycle brake fluid
- Bleeding the brakes
- Change the brake fluid - let's go
- Method 1: changing fluid using a hand lever or foot pedal
- 01 - Install the brake fluid reservoir horizontally
- 02 - Prepare the workplace
- 03 - Use a ring wrench, then install the pipe
- 04 – Carefully unscrew the cover
- 05 - Loosen the bleed screw and pump fluid
- 06 - Pump with brake lever
- 07 - Liquid transfer
- 08 - Ventilation
- 09 - Make sure the fill level is correct
- 10 - Pressure point on lever
- Method 2: replacing fluid with a vacuum pump
- Questions and answers:
This mechanic guide is brought to you at Louis-Moto.fr.
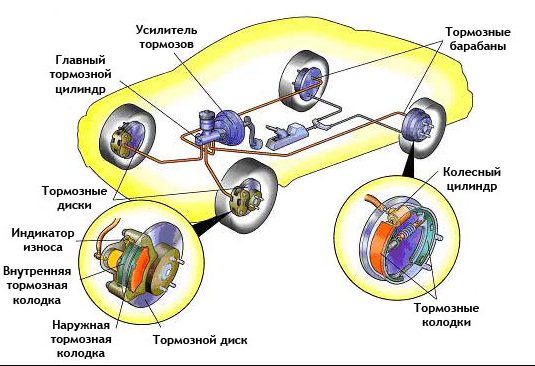
Good brakes are absolutely essential for the safety of motorcycles on the road. Therefore, it is necessary to regularly replace not only the brake pads, but also the brake fluid in hydraulic brake systems.
Replace motorcycle brake fluid
Can't see the brake fluid reservoir through the window? Can you only see black? It's time to replace the old stock with fresh clean light yellow brake fluid. Can you pull the handbrake lever to the throttle grip? Do you want to know what the expression "pressure point" can mean? In this case, you should immediately take a look at the hydraulic system of your brakes: it is indeed possible that there is air in the system, where there should be no air bubbles. Remember: To brake safely, the brakes must be serviced regularly. Here, we'll show you how to do it.
As we explain to you in our mechanics tips, the basics of brake fluid, hydraulic fluid ages over time. Regardless of the vehicle's mileage, it absorbs water and air even in a closed system. Consequence: The pressure point in the braking system becomes inaccurate and the hydraulic system can no longer withstand strong thermal loads during emergency braking. Therefore, it is important to change the brake fluid according to the manufacturer's recommended maintenance intervals and bleed the brake system at the same time.
Warning: utmost care is vital during this work! Working with braking systems is critical to road safety and requires in-depth technical knowledge of the mechanics. So don't risk your safety! If you have the slightest doubt about your ability to carry out these works on your own, be sure to entrust this to a specialized garage.
This is especially true for braking systems with ABS control. In most cases, these systems have two brake circuits. On the one hand, a circuit controlled by a brake pump and actuating the sensors, on the other hand, a control circuit controlled by a pump or a pressure modulator and actuating the pistons. In most cases, brake systems of this type must be bled by an electronic system controlled by the shop's computer. Therefore, this is not a job that can reasonably be done at home. That is why below we describe only the maintenance of brake systems. without ABS !
Always ensure that toxic brake fluids containing DOT 3, DOT 4 or DOT 5.1 glycol do not come into contact with painted car parts or your skin. These liquids will destroy paint, surfaces and skin! If necessary, rinse as quickly as possible with plenty of water. DOT 5 Silicone Brake Fluid is also toxic and leaves a permanent lubricating film. Therefore, it should be carefully stored away from brake discs and pads.
Bleeding the brakes
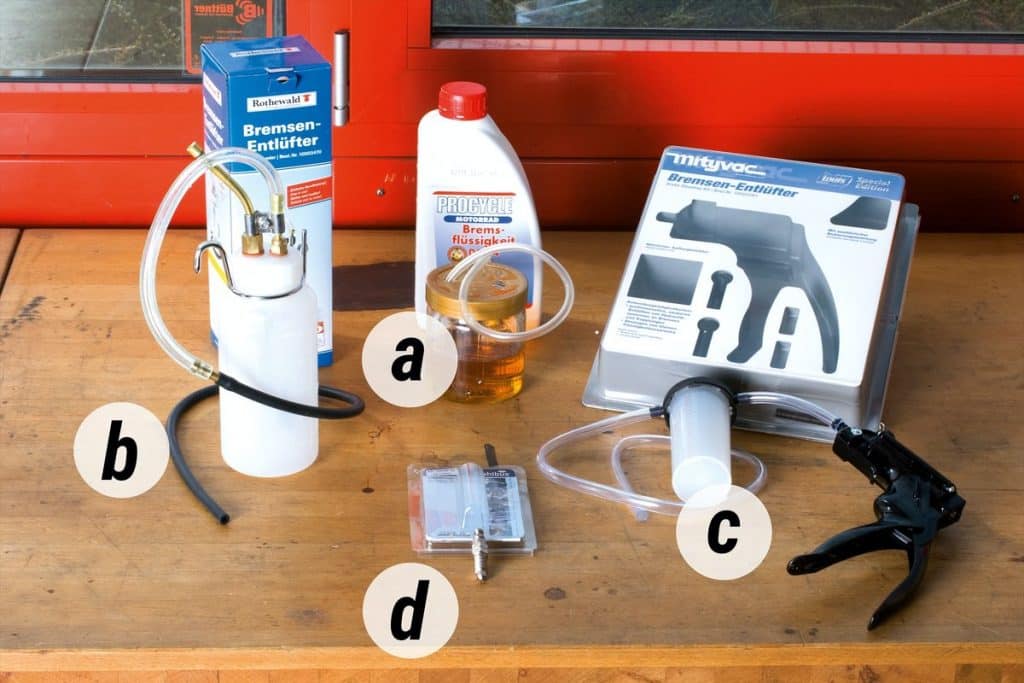
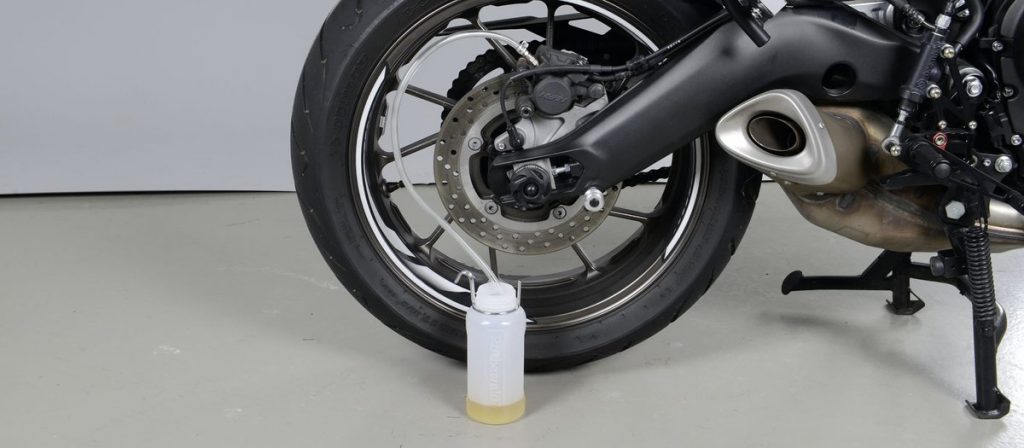
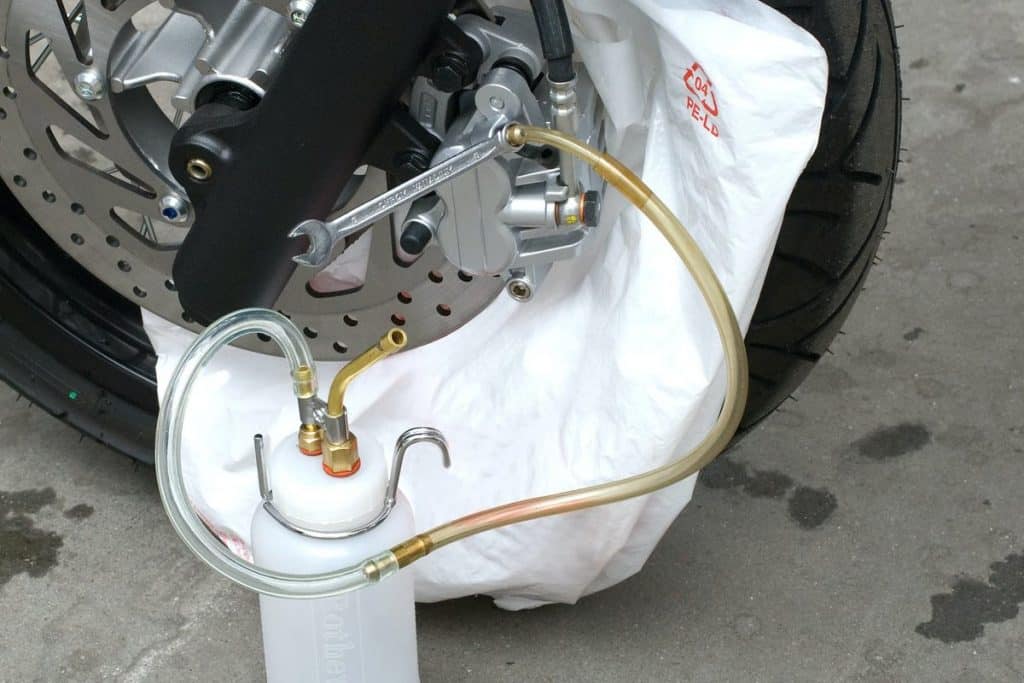
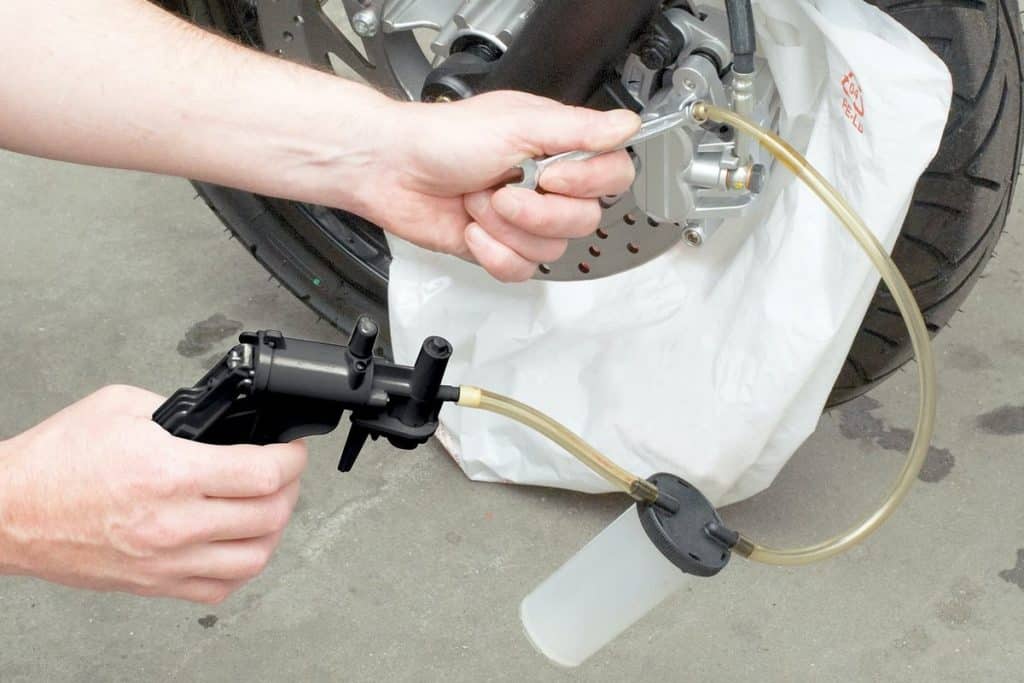
There are two different methods for disposing of used brake fluid and bleeding air from the brake system: you can either pump the fluid with the brake lever / pedal to remove it into a drip tray, or suck it up using a vacuum pump (see Photo 1c).
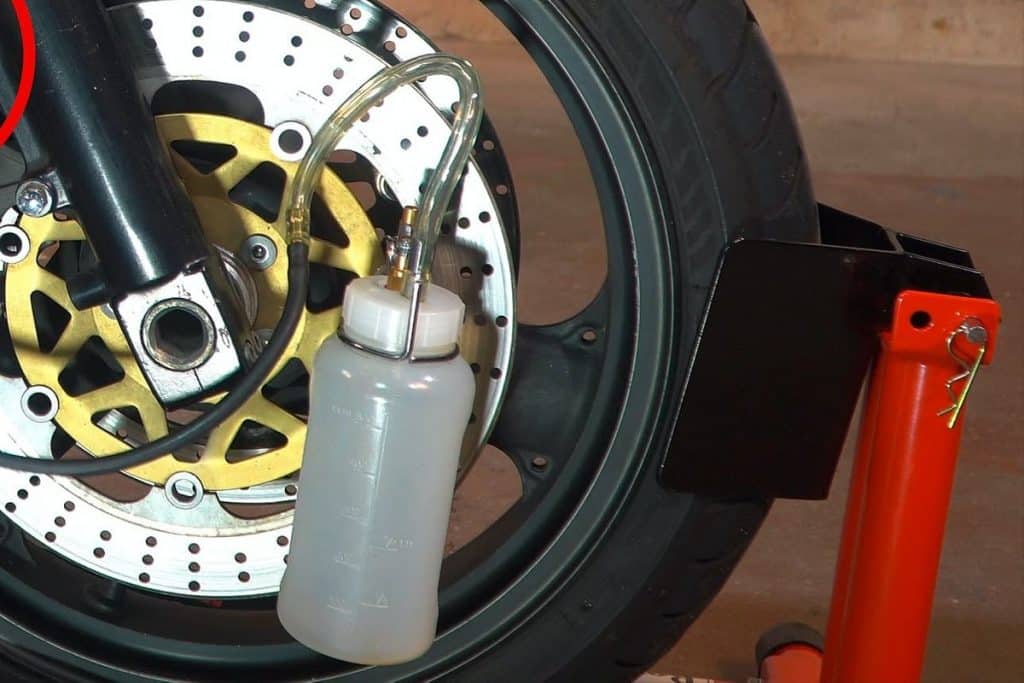
The pumping method allows you to force the brake fluid into an empty container through a transparent tube (see Photo 1a). Pour a small amount of new brake fluid into this container (approximately 2 cm) before starting to prevent accidental entry of air into the hydraulic system through the hose. Make sure the container is stable. The end of the hose must always remain in the liquid. A simpler and safer solution is to use a brake bleeder with a check valve (see photo 1b) that reliably prevents air backflow.
Alternatively, you can also use the Stahlbus brake bleed screw with check valve (see Photo 1d) to replace the original brake bleed screw. After that, you can leave it in the car for a long time, which will greatly simplify further maintenance work on the brake system.
When removing air from the system, constantly monitor the level of fluid in the valve tank: never allow it to drain completely to prevent air from re-entering the system, which will require you to start from the very beginning. ... Never skip fluid change intervals!
In particular, if the volume of the reservoir and brake calipers of your car is small, which is usually the case on motocross bikes and scooters, emptying the reservoir by suction using a vacuum pump is very fast. Therefore, in this situation, it is preferable to drain the oil by bleeding with the brake lever / pedal. On the other hand, if your car's brake hose is long and the volume of fluid in the reservoir and brake calipers is large, a vacuum pump can make your job much easier.
Change the brake fluid - let's go
Method 1: changing fluid using a hand lever or foot pedal
01 - Install the brake fluid reservoir horizontally
The first step is to lift the vehicle safely. Install it so that the still closed brake fluid reservoir is approximately horizontal. For this, it is advisable to use a workshop stand suitable for your car model. You can find tips for lifting your vehicle in our basic knowledge of mechanical crutch tips.
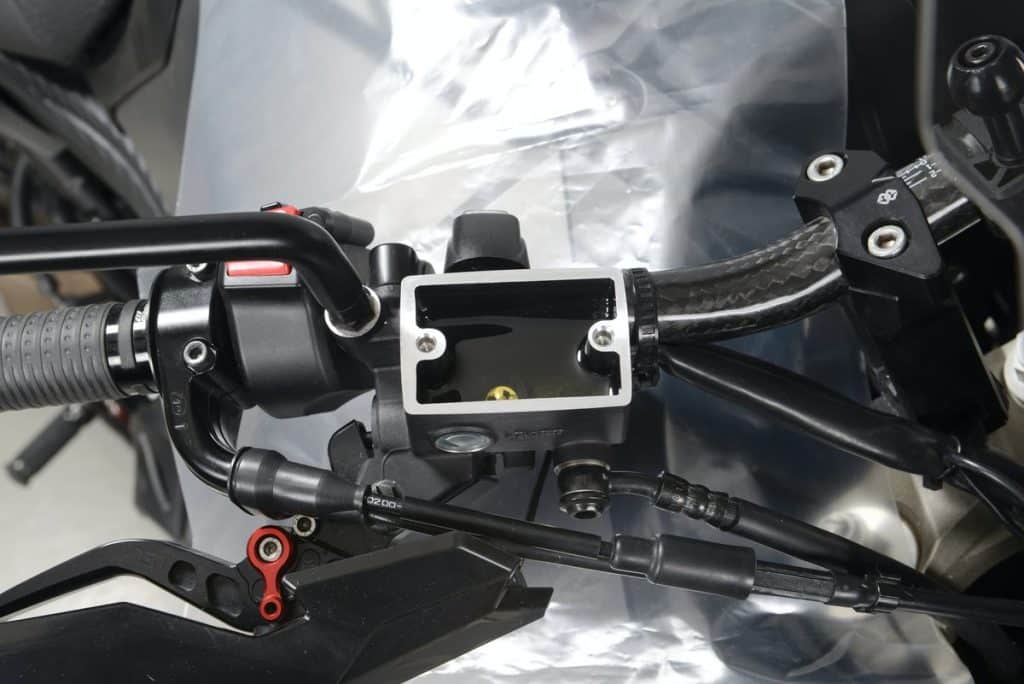
02 - Prepare the workplace
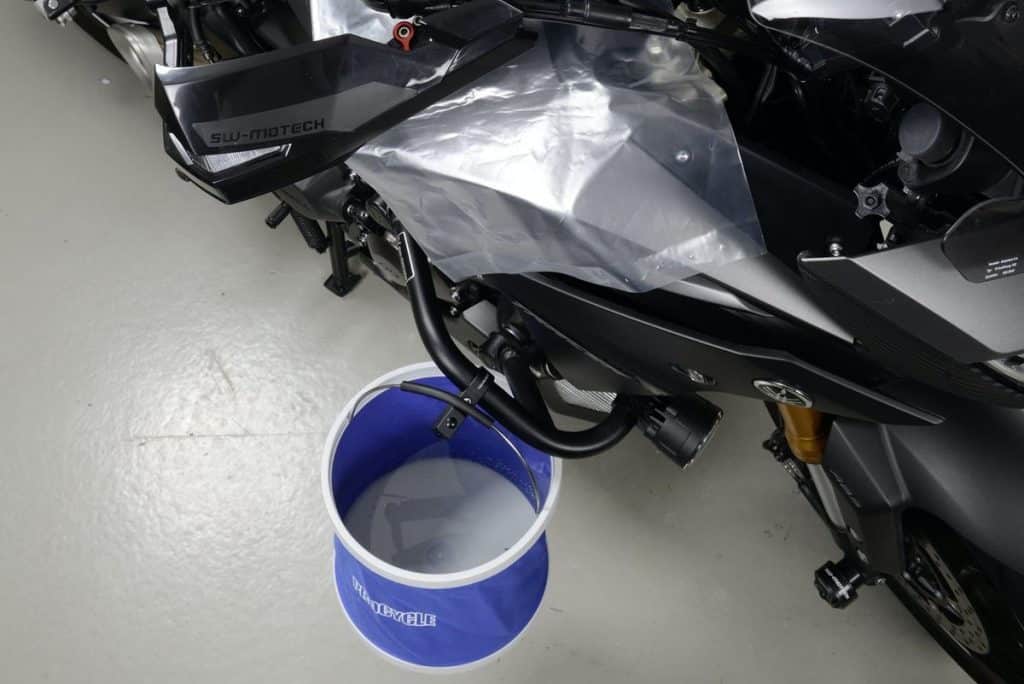
Then cover all painted parts of the motorcycle with a suitable film or similar to avoid damage caused by splashing brake fluid. Feel free to be extra legible: it's hard to get the job done without dirt. Which would be a shame on your car's aesthetics. As a safety measure, keep a bucket of clean water handy.
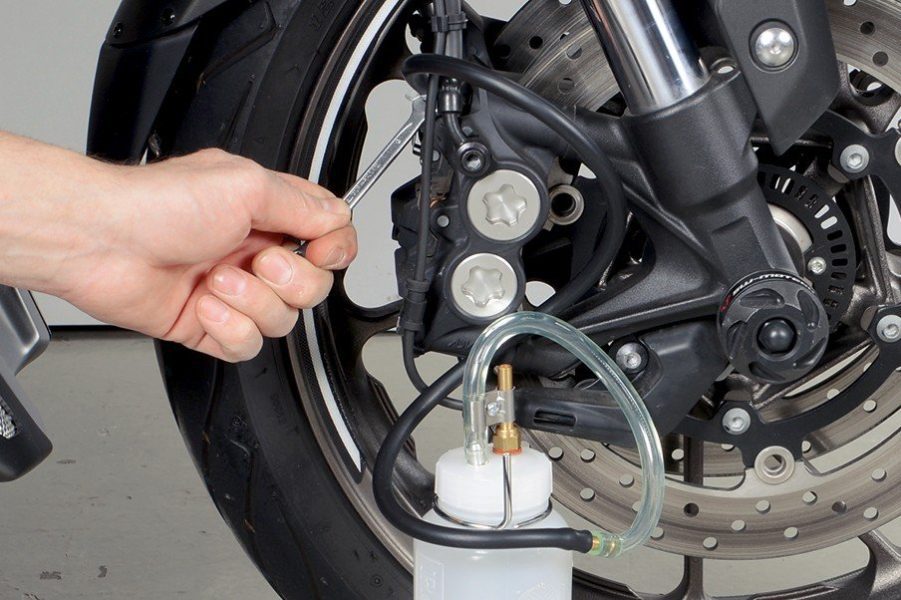
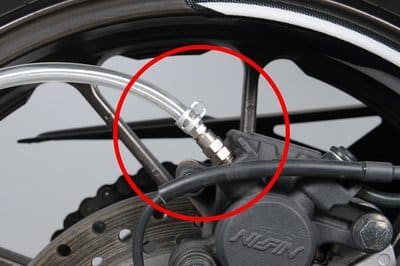
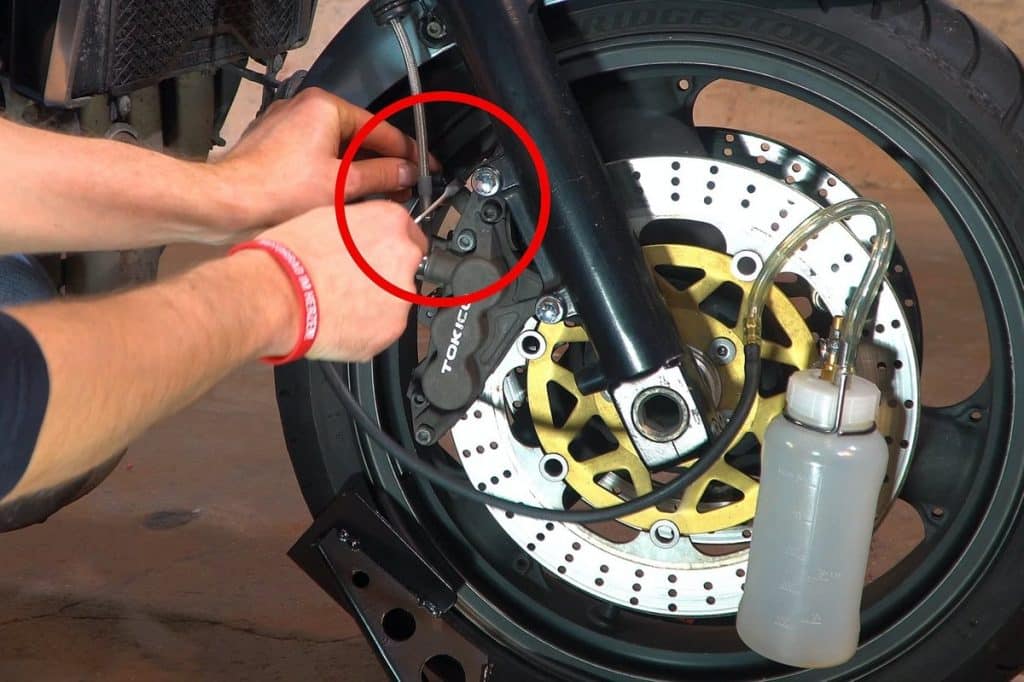
03 - Use a ring wrench, then install the pipe

Begin by bleeding the brake system with the bleed screw farthest from the brake fluid reservoir. To do this, apply a suitable box wrench to the brake caliper bleed nipple, then connect a tube connected to the brake bleed nipple or reservoir. Make sure the hose fits properly on the bleed screw and cannot slip off on its own. If you are using a slightly old pipe, it may be sufficient to cut a small piece of it with pliers to make sure it stays in place. If the hose is not properly seated on the bleed screw, or if the bleed screw is loose in the thread, there is a risk that a fine jet of fine air bubbles will seep into the hose. For added security, you can also secure the hose, for example. using a clamp or cable tie.
04 – Carefully unscrew the cover
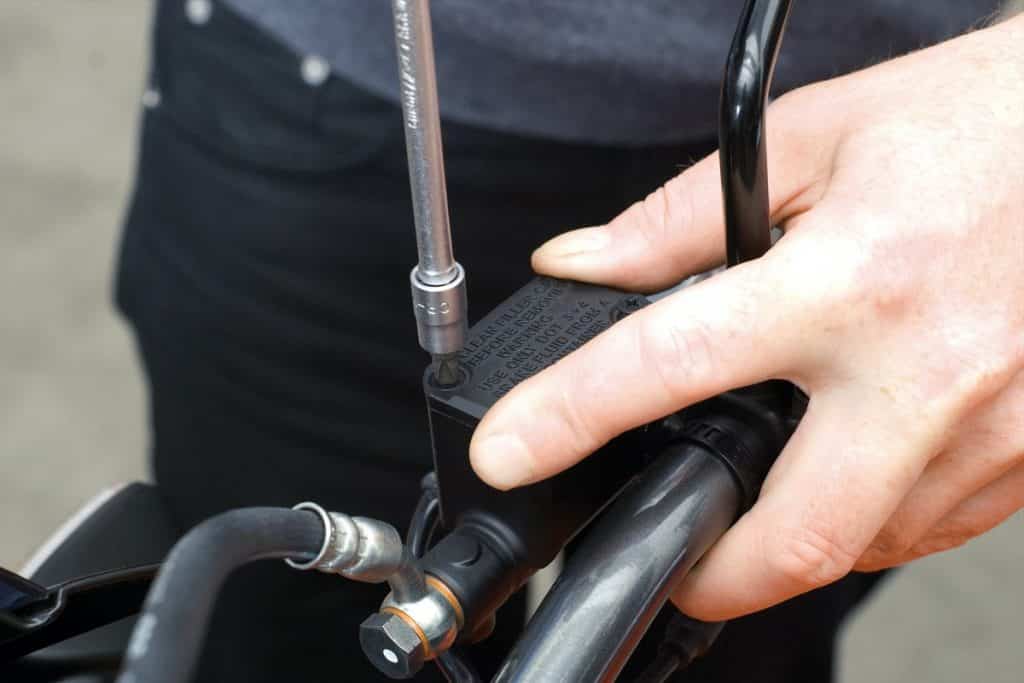
Carefully remove the screws on the brake fluid reservoir cap. Make sure a screwdriver is suitable for installing Phillips head screws. Indeed, the small Phillips screws are easy to damage. Lightly hitting the screwdriver with a hammer will help loosen jammed screws. Carefully open the cover of the brake fluid reservoir and carefully remove it with a rubber insert.
05 - Loosen the bleed screw and pump fluid
Then carefully loosen the bleed screw with a spanner wrench by turning it half a turn. Be sure to use the appropriate key here. This is because when the screw is not loosened for a long time, it tends to be reliable.
06 - Pump with brake lever
The brake lever or pedal is used to pump out the used brake fluid from the system. Proceed with great care as some brake cylinders tend to push fluid through the bleed screw threads into the brake fluid reservoir when pumping and, if so, spray it onto painted parts of the car. Make sure that the brake fluid reservoir is never completely empty!
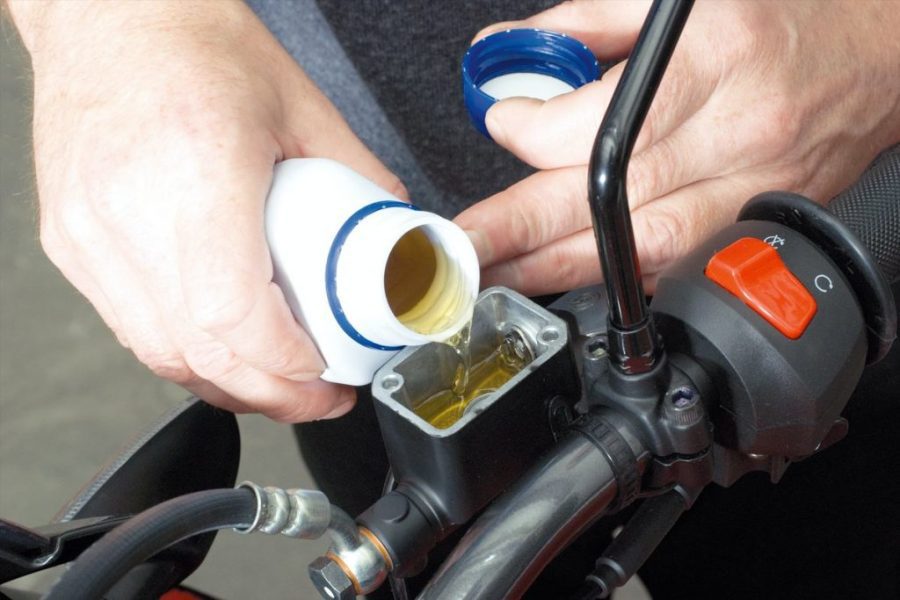
In the meantime, add new brake fluid to the brake fluid reservoir as soon as the level drops noticeably. To do this, proceed as described above: no air must enter the system!
If the fluid does not flow properly, there is a little trick: after each pumping, retighten the bleed screw, then release the lever or pedal, loosen the screw and start pumping again. This method takes a little more work, but it works well and effectively removes air bubbles from the system. Bleeding the brakes with a non-return valve or a Stahlbus screw will save you the trouble. Indeed, the check valve prevents any backflow of liquid or air.
07 - Liquid transfer
Keep up the good work, keeping a close eye on the level of the brake fluid in the reservoir until only new, clean fluid without bubbles flows through the clear tube.
Press down on the lever / pedal one last time. Tighten the bleed screw while keeping the lever / pedal depressed.
08 - Ventilation
Depending on the system, you must bleed the air from the brake system through the next bleed screw, proceeding as described previously / in the case of double disc brakes, this step is performed on the second brake caliper of the system.
09 - Make sure the fill level is correct
After the air has been removed from the brake system through all the bleed screws, fill the reservoir with brake fluid, setting the reservoir in a horizontal position to the maximum level. Then close the jar by putting on a clean and dry (!) Rubber insert and lid.
If the brake pads are already slightly worn, be careful not to fill the reservoir completely to the maximum level. Otherwise, when replacing the pads, there may be too much brake fluid in the system. Example: If the gaskets are 50% worn, fill the can halfway between the minimum and maximum fill levels.
Tighten the Phillips screws (in most cases it is easy to tighten) with a suitable screwdriver and without force. Do not overtighten or the next fluid change may be problematic. Check the vehicle thoroughly again to make sure that no brake fluid has spilled on it. If necessary, carefully remove them before the paint is damaged.
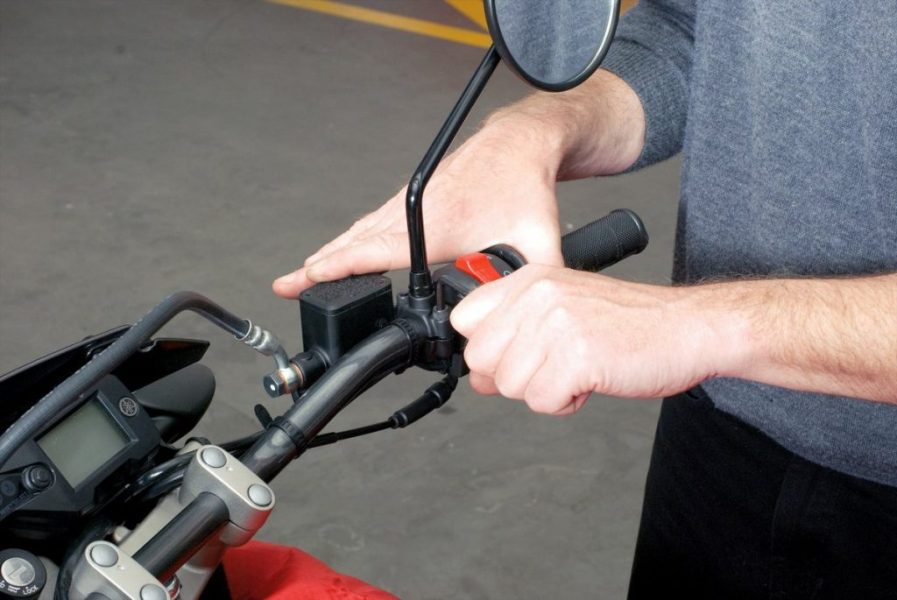
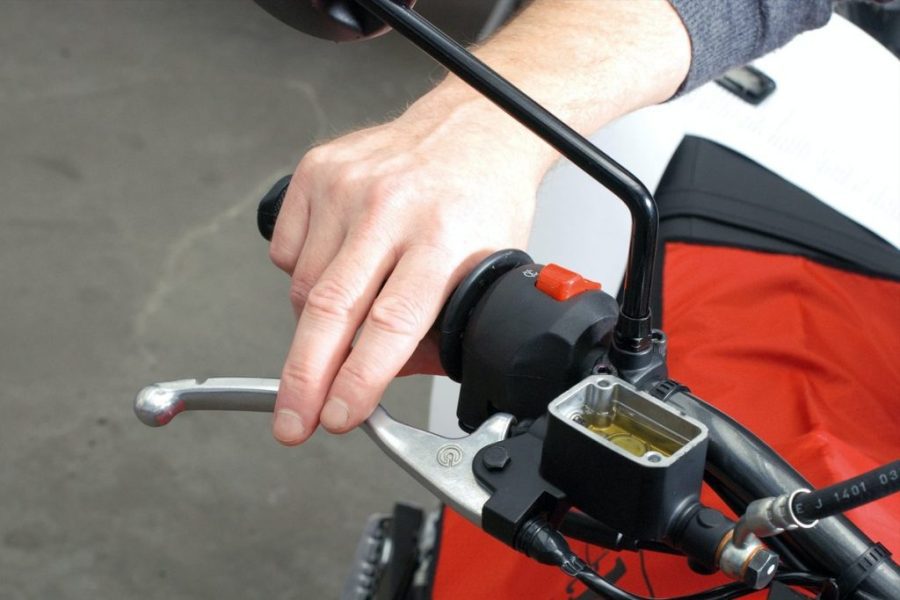
10 - Pressure point on lever
Increase the pressure in the brake valves by pressing the brake lever / pedal several times. Make sure you can still feel the fixed point of pressure on the lever or pedal after a short no-load travel. For example, you should not operate the brake lever on the handlebar up to the handle without encountering strong resistance. As described earlier, if the pressure point is insufficient and not stable enough, it is possible that there is still air in the system (in this case, repeat venting), but there is also a brake caliper leak or a worn out hand pump piston.
The note : If after a few bleeds and a thorough check for leaks, the pressure point is still not stable, use the following procedure, which has already been tested: Pull the brake lever firmly and lock it against the throttle grip, for example. with a cable tie. Then leave the system under pressure in this position, ideally overnight. At night, persistent, small air bubbles can safely rise up into the brake fluid reservoir. The next day, remove the cable tie, re-check the pressure point and / or perform a final air purge.
Method 2: replacing fluid with a vacuum pump
Follow steps 01 through 05 as described in method 1, then continue as follows:
06 - Aspirate brake fluid and air
Using a vacuum pump, collect the used brake fluid as well as any air present in the reservoir.
- Fill the reservoir with new fluid in time until it is empty (see Method 1, step 6, photo 2).
- So always keep an eye on the fill level!
- Continue to operate the vacuum pump until only fresh, clean liquid, free of air bubbles, flows through the transparent tube (see Method 1, step 7, photo 1).
During the last evacuation with the vacuum pump, tighten the bleed screw on the brake caliper (see Method 1, step 7, photo 2). Depending on the system, you must bleed the brake system on the next bleed screw as described above / in the case of double disc brakes, this step is performed on the second brake caliper of the system.
07 – Visit a site
Then continue as described in Method 1, starting at Step 8, and exit. Then check the pressure point and make sure your motorcycle is clean.
Before returning to the road on your motorcycle, double-check the operation and effectiveness of the braking system.
Questions and answers:
Why change motorcycle brake fluid? The brake fluid ensures the correct operation of the brakes and also lubricates the system elements. Over time, due to temperature changes in the circuit, moisture can form and cause corrosion.
What kind of brake fluid is put into a motorcycle? It depends on the manufacturer's recommendations. If there are no special prescriptions, then the same TJ can be used in motorcycles as in cars - DOT3-5.1.
How often should the brake fluid on a motorcycle be changed? Every 100 kilometers of run, the fluid level must be checked, and the replacement of the TJ is carried out approximately two years after filling.
