How to choose and install do-it-yourself caliper pads
Content
Car tuning has many directions. Some of them allow you to change the car beyond recognition, while others concern only minor details. The second category includes the installation of decorative linings on auto brake calipers.
Let's take a closer look at how to correctly perform this procedure, as well as whether it is worth using it.
What are caliper pads?
As for tuning, not every motorist can afford it. The fact is that an outwardly unremarkable car can be "pumped" beyond recognition. Such upgrades always cost a lot of money. Moreover, these alterations are sometimes much more expensive than the car itself.
The situation is different with visual tuning. Conversion kits can cost pennies, but give the vehicle an original style. And more often than not, this design hints at the sporty characteristics of the car. For this purpose, brake linings are also purchased.
Not every car owner can set aside a decent amount to buy a high-quality and expensive braking system from leading manufacturers. But the brake caliper pad, one to one similar to the original spare part, is affordable for most motorists.
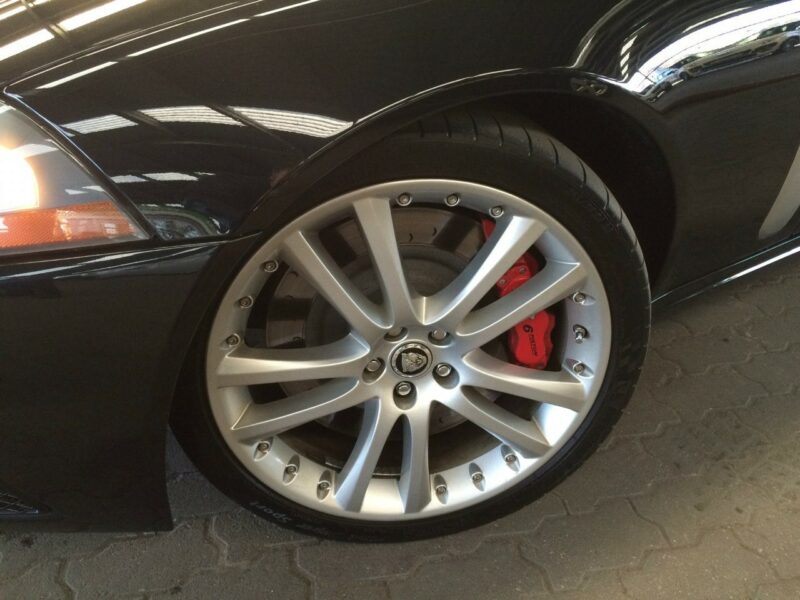
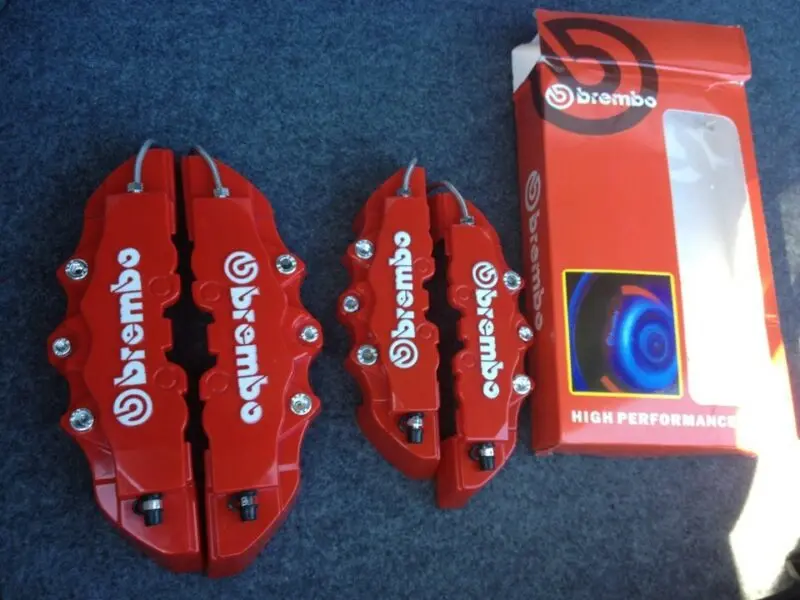
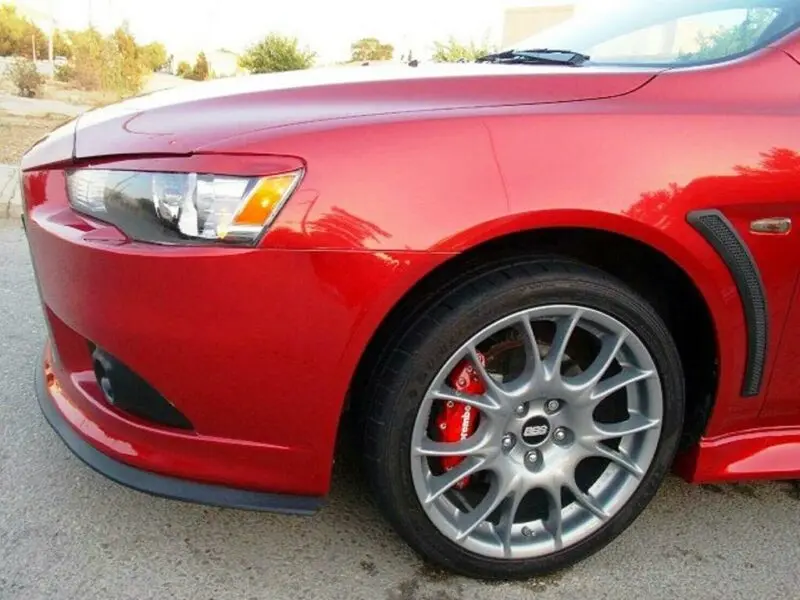
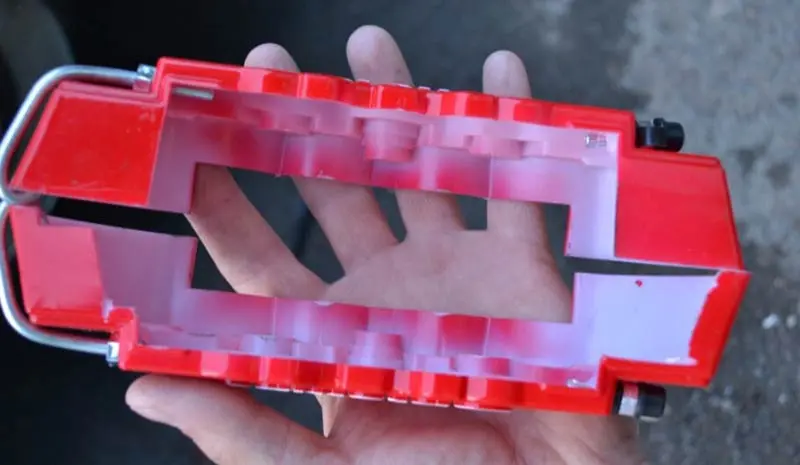
These decorative elements look like a cover for a regular caliper, and outwardly do not differ from a real part from leading manufacturers of spare parts. Most often, such pads are made of heat-resistant plastic, but there is also a metal analogue, which is more reliable, and does not fly off after a couple of kilometers.
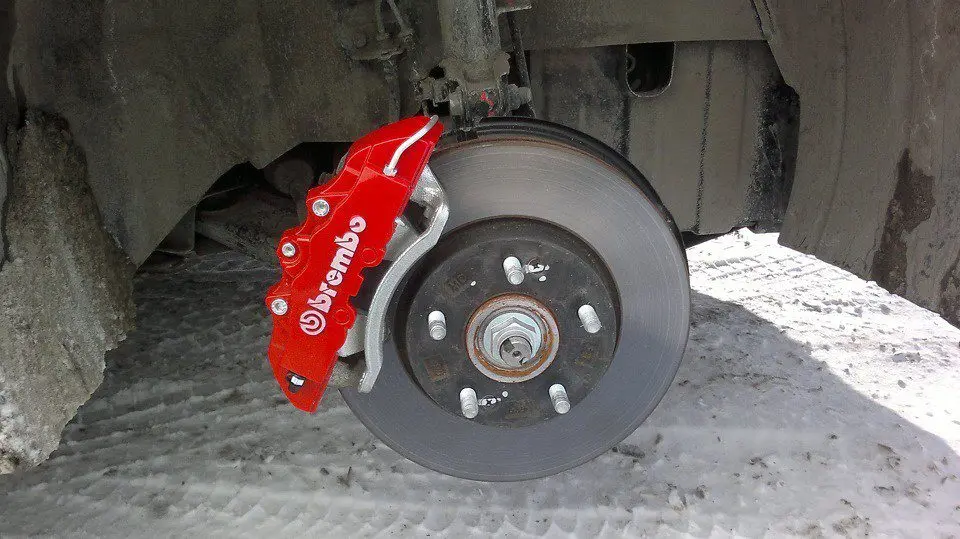
To attract attention, the lining has a bright color, and most often it is the inscription of a leading manufacturer of luxury braking systems. One such brand is Brembo. The name itself causes delight among some motorists, even if they do not understand the intricacies of such a system.
What are these overlays for?
Although some car owners try to see some kind of rational grain in such elements, they carry nothing but aesthetics. This is a purely decorative element. Such covers provide neither protection against dust and moisture, nor additional cooling. Moreover, the presence of a cool inscription does not in any way affect the quality of the standard brake system. The only thing such pads do is attract the attention of passers-by to the car.
Most professionals are skeptical about this type of tuning, because the presence of cool elements in a car does not make it more productive. But on the other hand, a beautiful wheel does not fit well with ordinary calipers, so the logic in the use of such elements is still present.
How to choose caliper pads
Before buying such an accessory, you should understand that they are not universal, and therefore may not fit in size. First of all, you should write down the dimensions of the caliper itself - its height, width and thickness.
The purpose of the overlay is to mask the standard part, so too small either will not attach to the caliper, or parts of it will be visible along the edges. Large accessories can cling to the wheel rim or the spokes while riding and break.
Size is the only parameter to be guided by. Everything else: color, design, lettering, material is a matter of personal preference. Car accessories manufacturers use durable material, so don't think that the plastic cover will break quickly. If the size is correctly selected, then the element will hold for a long time.
How to install caliper pads
Now let's look at the process of installing the caliper pad. There are two ways to fix it:
- Using a sealant. This is the fastest way. It is important to follow the rules for using the material. The substance must be firmly fixed to the treated surface. For this reason, the caliper must be well cleaned and degreased.
- With self-tapping screws. When performing this procedure, you should be careful that the fastening of the decorative element does not interfere with the work of the part itself.
Further, we will consider each procedure in detail.
DIY installation of overlays
Regardless of which method was chosen, it is necessary to carry out preparatory work. We hang the car, remove the wheel, and clean the calipers. Most accessories have a flat interior, so there won't be a perfect match with the part. You need to manually "modify" the pad so that it fits as tightly as possible. In order to mask the standard caliper as much as possible, it can be pre-painted in a color that matches the shade of the lining.
- If the sealant method is chosen, it is very important that the surfaces to be joined are clean. We carry out the final "fitting", and make sure that the cover sits tightly. Next, follow the adhesive manufacturer's recommendations for gluing the parts together and let the parts dry. We put the wheel in place and repeat the procedure with the other wheels.
- Some also use self-tapping screws or bolts as insurance in addition to the sealant. It would be practical to choose retainers that will not rust over time. Before connecting the parts of the lining, holes should be made in them, slightly thinner than the thickness of the self-tapping screw. So, when you twist it, the accessory will not burst.
After the installation of the pads is completed, you need to perform a test drive. It is needed to determine if parts of the accessory are clinging to the wheel. If the size is correct and the installation is neat, the part will not rub. You also need to test the brakes to make sure the vehicle is safe before it hits the road.
Finally, a short video on how to complete this procedure:

Questions and answers:
How to glue the caliper pads? Since the brake elements become hot during braking, heat-resistant sealants should be used. An example of this is ABRO masters red sealant.
How to install the caliper pads? When working with the sealant, you must wear gloves and the room must be ventilated. The surfaces are cleaned and degreased, a sealant is applied, the pad is pressed.