DIY plastic bumper repair
Content
Cracks in plastic products are common, especially if it is a bumper. Modern cars are equipped with plastic bumpers. When the street is dark, and the windows in the car are tinted, it is very easy not to notice an obstacle and run into it, for example, handing it back.
Depending on the type of damage, this part can be repaired, instead of buying a new one. Consider repair methods for plastic bumpers, as well as what materials and tools are suitable for this.
Classification of damage to the plastic bumper
Damage to plastic depends on the strength of the impact, as well as on the structure of the surface that the car is hooked on. The material used by manufacturers may vary, so the nature of the damage varies. In some cases, the manufacturer does not allow repair of the bumper, in others such an opportunity is allowed.
If all types of damage to plastic bumpers are divided into categories, you get four varieties:
- Scratch. This type of damage is easily repaired by staining. Sometimes the scratch is shallow, and it is enough to polish it. In other cases, the damage is deeper, and slightly changes the surface structure at the site of impact (deep cut).
- Cracks. They arise as a result of stronger blows. The danger of this type of damage lies in the fact that sometimes they are difficult to notice during visual inspection. In case of cracking of the bumper, manufacturers do not recommend using the part, but replace it with a new one. The problem can be aggravated by the fact that when the machine moves, vibrations are transmitted to the body, which can increase the size of the crack, which can result in chipping of a large piece of plastic.
- Dent. Depending on the material from which the bumper is made, damage can take the form of a dent in the place of strong mechanical stress. This type of damage will always combine scratches and cracks.
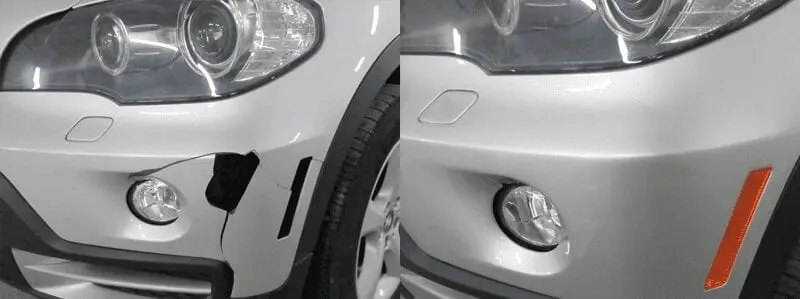
- Through breakdown, cleaved. This is the most unpleasant type of damage, since repairing a damaged area can be complicated by the absence of a small piece of plastic that cannot be found. Such damage occurs as a result of a point collision or impact on an acute angle.
Each type of damage requires its own algorithm for repair work. In the first two cases, the problem is eliminated with paint and polish. Consider how to eliminate the most severe damage.
How to prepare a bumper for repair
Before proceeding with the restoration of the bumper, it must be removed from the machine. It is extremely important to be careful so as not to spoil the part completely.
The next step that will help to properly prepare the item for repair is cleaning it from dirt. Since materials with adhesive properties will be used in the recovery process, the surface should be as clean as possible. To do this, you can use any detergent. It is important that it does not contain abrasive particles, otherwise the paintwork will deteriorate.
LCP is removed only in the affected area. Moreover, the stripping must be performed both on the front and on the back side. A slightly larger surface should be cleaned, not the joint itself. Enough distance of two centimeters on each side.
Although most motorists call the bumper plastic or plastic, in fact, the materials for making such parts are very diverse. In one case, to make a quality repair is not difficult, and in the other part they simply will not be held together. Material can be found in the markings on the back of the bumper. The meaning of the characters can be found on the Internet.
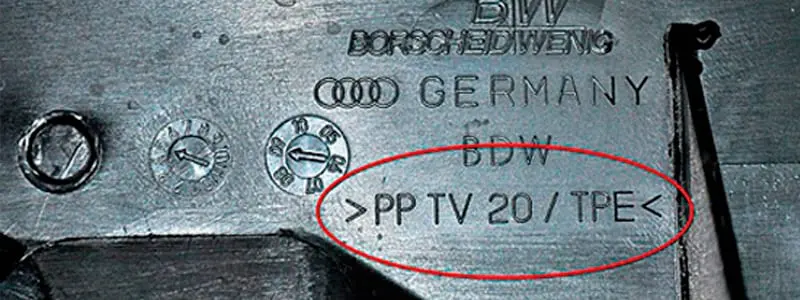
If the manufacturer did not provide this information, then in most cases the bumper is made of fiberglass. If it has not changed from the factory, the exact data on the material can be found in the official data of the manufacturer, which are indicated in the technical literature.
Bumper Repair Equipment
Before deciding on a tool, it is necessary to plan which method will be used: soldering or gluing.
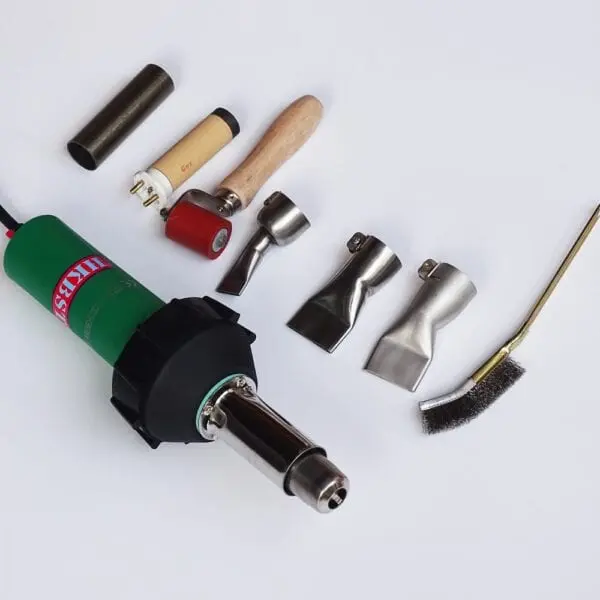
To repair the bumper by welding, you will need:
- Soldering iron (40-60 watts.);
- Knife;
- Building hair dryer;
- Sander;
- Staples, scotch tape;
- Scissors for metal;
- Drill with a thin drill;
- Flat screwdriver.
Soldering will require skills, so for beginners, the result does not always look decent. It’s easier to seal the bumper. In this case, you will need:
- Awl;
- Staples or kapron thread (to fix the joined parts);
- Fiberglass;
- Glue (it should be clarified how the bumper material will react to it). It can be epoxy or polyester.
Bumper Repair Technology
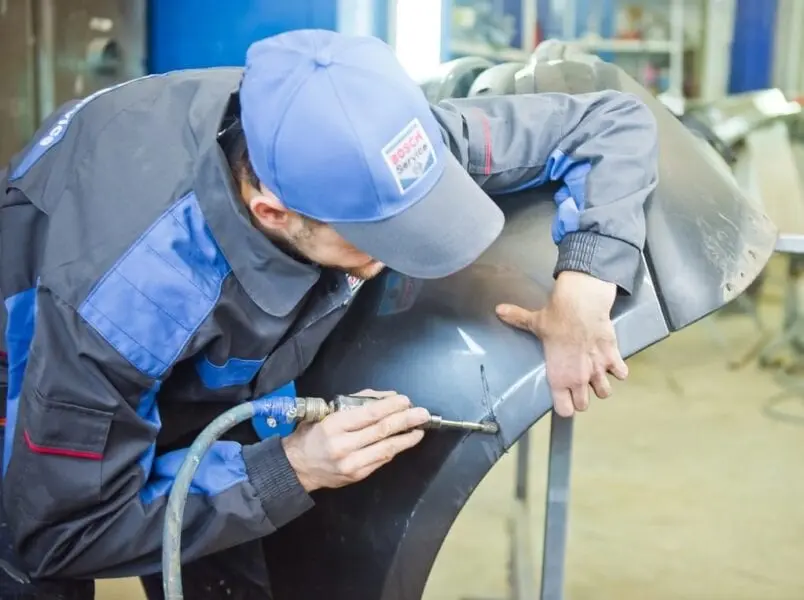
To prevent the crack from spreading during the repair process, small holes should be made along its edges. This is done with a drill with the smallest drill. Then both parts are connected, and glued with a transparent adhesive tape on the outside.
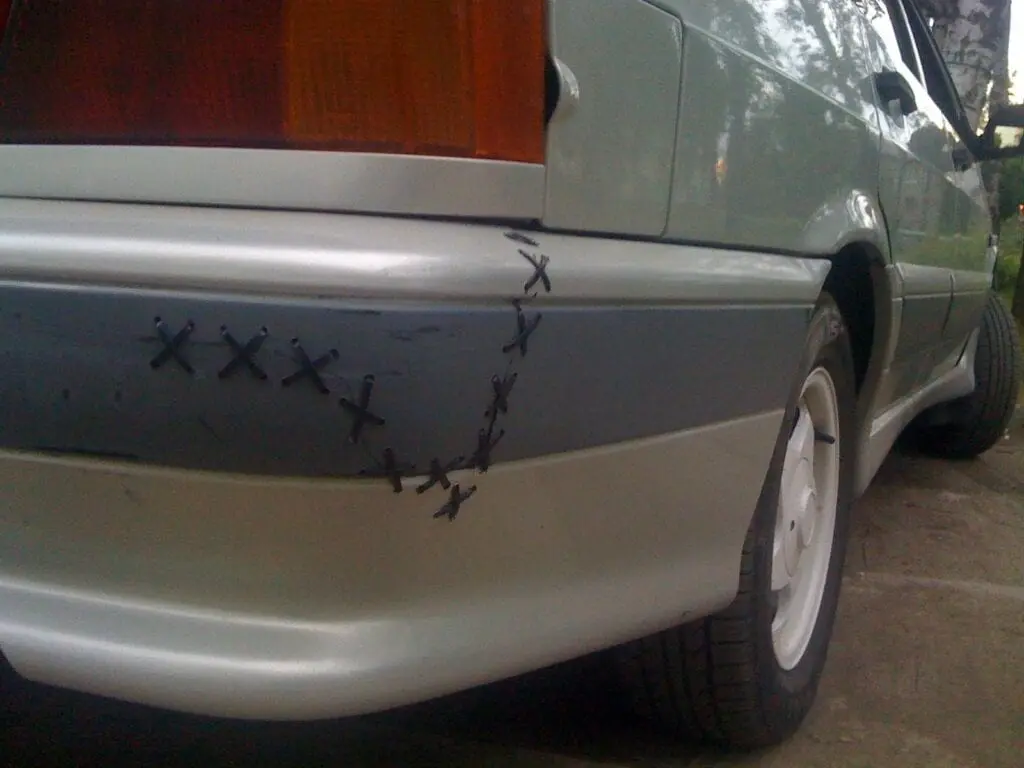
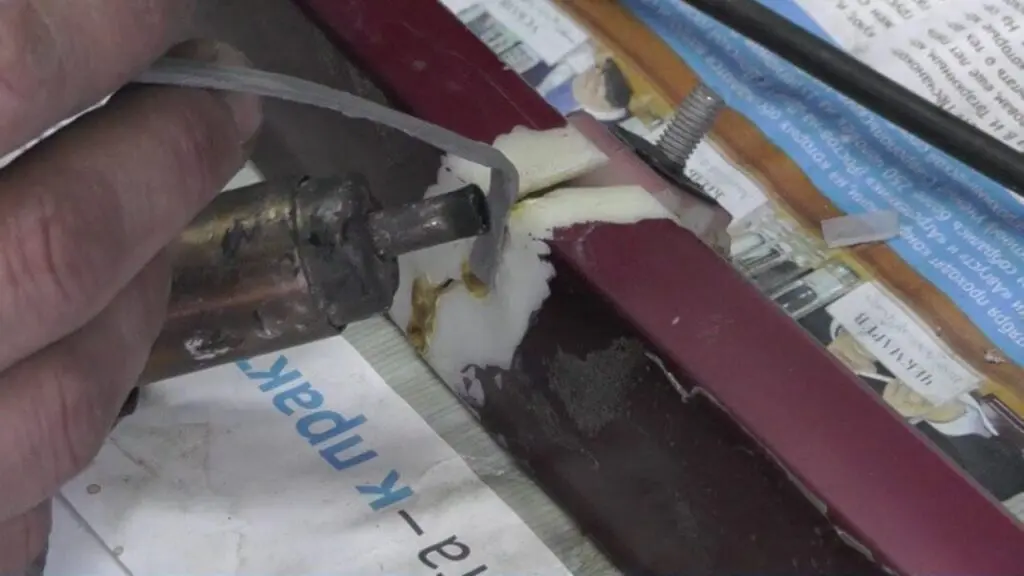
We conduct a heated soldering iron from the inside along the crack (a shallow groove should form). Thanks to the fusion, the edges are firmly connected to each other. The next step will be stapling with staples. You can use furniture staples for this.
A metal particle lies on the molten plastic so that one edge is on one part and the other on the second. Over time, the metal rusts, so you need to try to cover the staples with plastic. This is a kind of reinforcement of the seam.
When working with a soldering iron, you need to be careful not to burn through the plastic through. An identical procedure is carried out from the front of the bumper. The only difference is that staples are not used on this side.
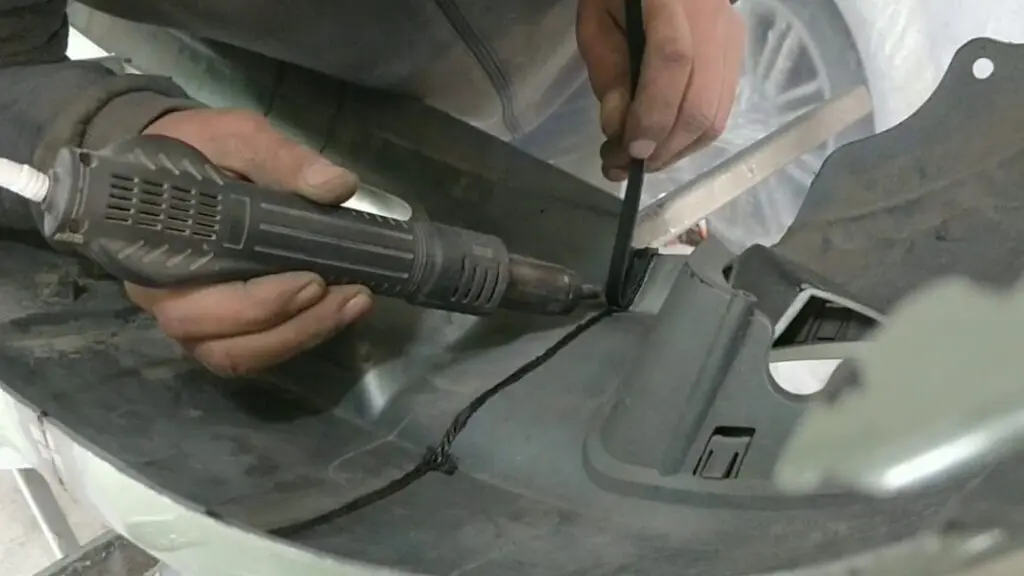
Now you need to cut strips of material. In this case, to repair the part, a building hair dryer is required. It should have a flat nozzle into which strips of plastic will be inserted (the material should be identical to the one from which the part itself is made).
The most ideal option for the procedure will be identical to the repaired bumper donor. Strips of the appropriate width are cut out of it using scissors for metal.
First, from the back, you need to test the work scheme so as not to spoil the front of the product. Correctly selected material will not come off after hardening. To repair large cracks, the treated area is divided in half. First, a short strip is surfaced in the center. Then each part is also divided into two halves. A small piece of electrode is applied in the middle. Then the remaining gaps are filled.
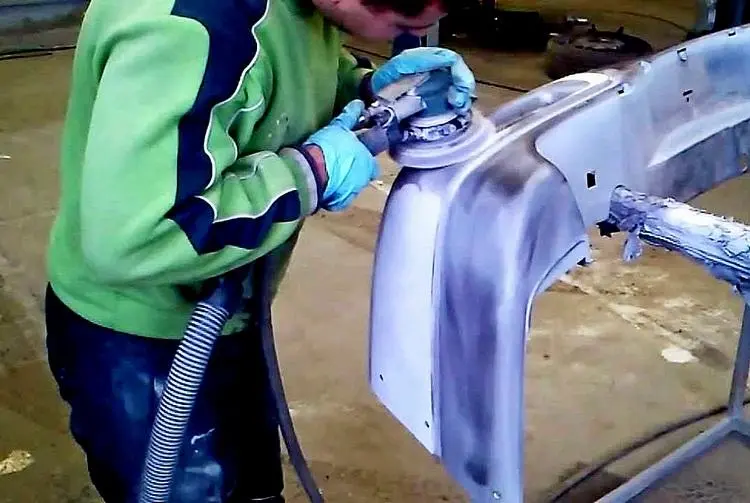
The resulting irregularities are eliminated with a grinding machine (grit size of the P240 abrasive). In order to not remove too large a layer of plastic in the inaccessible part, you can use sandpaper or seal the joint with a putty for plastic. Thin hairs formed after processing the grinder can be removed using an open flame (for example, with a lighter).
Work with different materials have their own subtleties.
Rules for repair by surfacing of polypropylene parts
If the material from which the part is made is polypropylene, then here are the things to consider before performing repairs:
- The width of the electrode should be about 3-4 mm;
- The corresponding hole should be in the nozzle of the hairdryer;
- It is imperative to know the temperature at which polypropylene melts. The material is thermoset, so in certain situations it may lose its properties. The electrode should melt quickly. In this case, it must not be allowed to overheat, otherwise it will lose its properties;
- Before covering the crack, a V-shaped groove must be made along its edges. So the material will fill the space and after decorative processing does not exfoliate.
Repair rules for surfacing polyurethane parts
If the bumper is made of polyurethane, important conditions will be:
- The material is quite elastic, so you should additionally use staples. As with the soldering above, the metal must be completely covered to prevent rusting.
- Polyurethane is thermoactive and melts at a temperature of 220 degrees. If this limit is exceeded, the material will boil and lose its properties.
- To repair such parts, strips about 10 mm wide are needed. An identical size should be a hairdryer nozzle.
Bonding Repair
This is one of the easiest, and at the same time crucial, ways to repair bumpers. In the case of hard plastic, soldering is not used, since the material has a very high melting point (about 5000 degrees).
The repair sequence for such parts is as follows:
- With the help of a grinder, the edges of the connected parts are cleaned to eliminate small fibers that have formed after the break.
- Both halves are joined and fixed with adhesive tape. To prevent the film from interfering with fiberglass sticking, many use synthetic thread. It is important to determine how it will react to the chemical composition of the adhesive. To fix the parts to be glued, thin holes are made in them into which the thread is threaded (or a bracket is installed). One end of the thread is laid along the groove made, and the entire section is “stitched” with the second end. It is important that when tightening the elements, the joint does not deform, otherwise the bumper will turn out to be curved.
- Next, glue is prepared (if it consists of several components) in accordance with the instructions.
- Glue is applied from the inside along the entire crack. The cultivated area should be 5 centimeters wider on each side.
- Fiberglass is applied to the glue. The layer must be increased to the extent that it does not align with the plane of the whole part of the bumper (if a dent forms as a result of the impact).
Once the inside is dry, you can continue to work with the other part. The procedure for the front part is identical, only before gluing fiberglass the seam must be strengthened. To do this, a groove is made along the crack, which is filled with a mixture of fiberglass and glue.
The final stage of repair is priming and painting the product in a suitable color.
Сonclusion
Repairing a damaged bumper can be done at home. If there is any doubt that the work will be performed efficiently, you should ask for help from someone who has already performed a similar procedure.
In auto shops you can find special kits for repairing bumpers. It will be cheaper than buying a new part.
Questions and answers:
How to repair a crack in a plastic bumper? Fill the crack with liquid polymer; solder with a rod; solder with a construction hair dryer; glue with fiberglass; glue with two-component glue.
How can you glue a crack in a bumper? Fix the edges of the crack (using clamps or construction tape). Drill at the end of the damage (ABS plastic), degrease and clean the edges. Glue.
What do you need to repair a bumper? Powerful soldering iron or hair dryer; metal mesh for edge reinforcement; primer; putty; sandpaper of various grain sizes; dye.