How to paint a car with your own hands - a step by step guide
Content
Every motorist from time to time has an idea to restore the color of a used car, give it a new prestigious look, protect it from scratches and rust. Usually the lack of practice in painting and the terrible stories of other car owners about the difficulties of painting a car with their own hands affect. But still, how to paint the car yourself, provided that difficulties do not stop you and you are ready to do everything yourself?
Read our step-by-step DIY body painting guide. And this review tellshow to unscrew a rusted VAZ 21099 door nut before welding if there are no suitable tools at hand.
Preparation for painting
Before you paint a car with your own hands, you need to clean the surface of dust and dirt, for this use water and detergents. Bituminous and grease stains are easily removed from the body using white alcohol or special automotive tools, the choice of which is now very large. Never use gasoline or thinners to clean your car, as this can seriously damage the surface finish.
The first stage is the dismantling of the car (removal of the bumper, optics)
It is also necessary to remove all easily removable components from the car: external lighting, including turn signals, headlights and parking lights, a radiator grill, do not forget the front and rear bumpers. All parts removed from the machine must be thoroughly cleaned of rust, grease and set aside.
Elimination of defects
After the initial preparation and cleaning of the surface, you can start removing scratches, paint chips, cracks, and other cosmetic surface disturbances. To do this, the car should be parked in a brightly lit place and carefully check all paint defects. If you find a defect, paint it with quick-drying acrylic spray paint or regular chalk (white or colored). Next, you need to repeat the procedure for checking the body and note the remaining damage. Examination of the vehicle for damage will be of the highest quality if carried out in daylight.
The second stage is the editing and correction of the metal.
Using a sharpened screwdriver or chisel, sandpaper (no. 60, 80, 100), thoroughly clean the damaged areas, except metal. In order not to waste materials and not make unnecessary efforts, try to maximize the area to be cleaned to the size of the defect itself. We recommend to smooth the edges of the cleaned surface as much as possible, avoiding a sharp transition between the painted part and the cleaned part. This will make it easier to paint the car at home and will make the part clear of paintwork and even invisible. You should feel when you have reached the perfect transition. You can check the smoothness of the transition by sliding your hand over the surface. The hand is able to set the height difference up to 0,03 mm.
After these manipulations, it is necessary to thoroughly clean the treated surface of the body from dust, degrease areas, clean with alcohol and dry.
Sometimes when doing a major body overhaul or if there is a large damaged area, it is necessary to completely remove all the paint from the car. This is quite a labor-intensive process that requires patience and attention from a non-professional person, but if you are ready, you can do it yourself.
We level the surface with putty
Remove any defects and dents on the body before painting. To do this, in any store you need to buy rubber and metal spatulas, the dimensions of which correspond to the area of the sealant and synthetic polishing of essential cars. The sealant must be chosen very carefully, it must have high elasticity, increased adhesion to various surfaces, evenly distributed and with minimal shrinkage after drying. It also needs to be durable and of high quality.
The third stage is the sealing of the body and the removal of non-ideal surfaces.
If you want to effectively spread the sealant, it is best to use a special trowel made from a metal plate measuring 1,5 x 1,5 cm and 1 mm thick. Dilute the putty in the ratio of 2 tablespoons of putty on a strip of 30-40 mm.
Smear in very quick strokes and continue applying, being careful to apply the mixture as evenly as possible. To do this, move the trowel in a transverse motion in relation to the damaged surface. Please note that a chemical reaction occurs in the kneading mixture to form a putty that generates heat. Therefore, we recommend using the mixture immediately after preparation. After twenty-five minutes, it becomes unusable for its intended purpose.
It is best to apply sealer coats gradually at intervals of 15 to 45 minutes. During this time, the sealant does not have time to harden and is ready to apply the next layer without sanding.
Then you need to wait until the sealant has completely dried (30-50 minutes at a temperature of + 20 ° C). To check the finish of the surface, it is necessary to rub over it with 80 sanding paper. Curing is complete when the sealant is coated with flour and the surface to be treated becomes smooth and even. Often it is necessary to clean the surface several times, regularly filling it, to achieve absolute smoothness.
It is better to make the first layer thin, because smudges often affect it. If the paint is applied well, 2-3 coats will be sufficient. Then there are 2-3 layers of varnish. The next day you can admire the result, and if there are minor defects, then remove them by polishing.

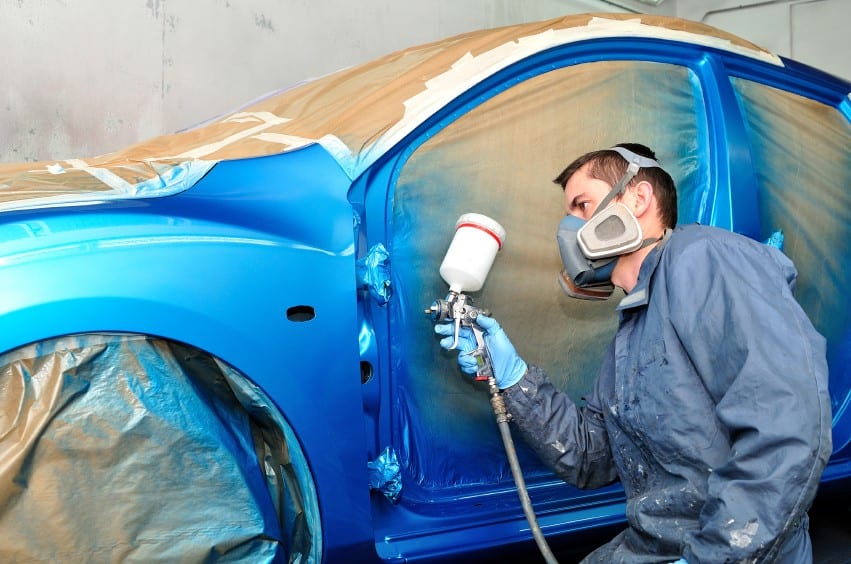
If high-quality materials were used during the work, then painting the car with your own hands will not be a problem and will give an excellent result. It is also important what tools were used for painting and in what conditions the painting was carried out.
It is important to carry out the entire painting procedure in a room with a minimum of dust, in good lighting, and if problems are found, immediately correct the problem either by re-painting or polishing.
Questions and answers:
How to paint a car in your garage? 1) old paint is removed; 2) dents are putty or leveled; 3) a primer is applied with a spray gun; 4) the primer dries up; 5) the main layer of paint is applied (the number of layers may be different); 6) varnish is applied.
How can you paint a car? Aerosol acrylic enamel. To avoid drips, the paint is applied with quick and uniform vertical movements (distance up to 30 cm.)
What materials are needed to prepare for painting a car? Abrasives (sandpaper), sander, putty (depending on the type of damage and the layer to be applied), acrylic primer.

3 comment
Modesta
Very rapidly this site will be famous amid all blog users, due to it’s pleasant content
Edmund
This piece of writing will assist the internet people
for setting up new weblog or even a blog from start to end.
anonym
lol